Effectors are objects that you can use to manipulate a region instead of an entire scene. Usually these are 'empty' objects that are visible in the Blender viewport but not in any final renders. Effectors are useful for controlling and art directing effects. Below are examples of how to implement them in Blender with Animation Nodes.
Effector Cubes
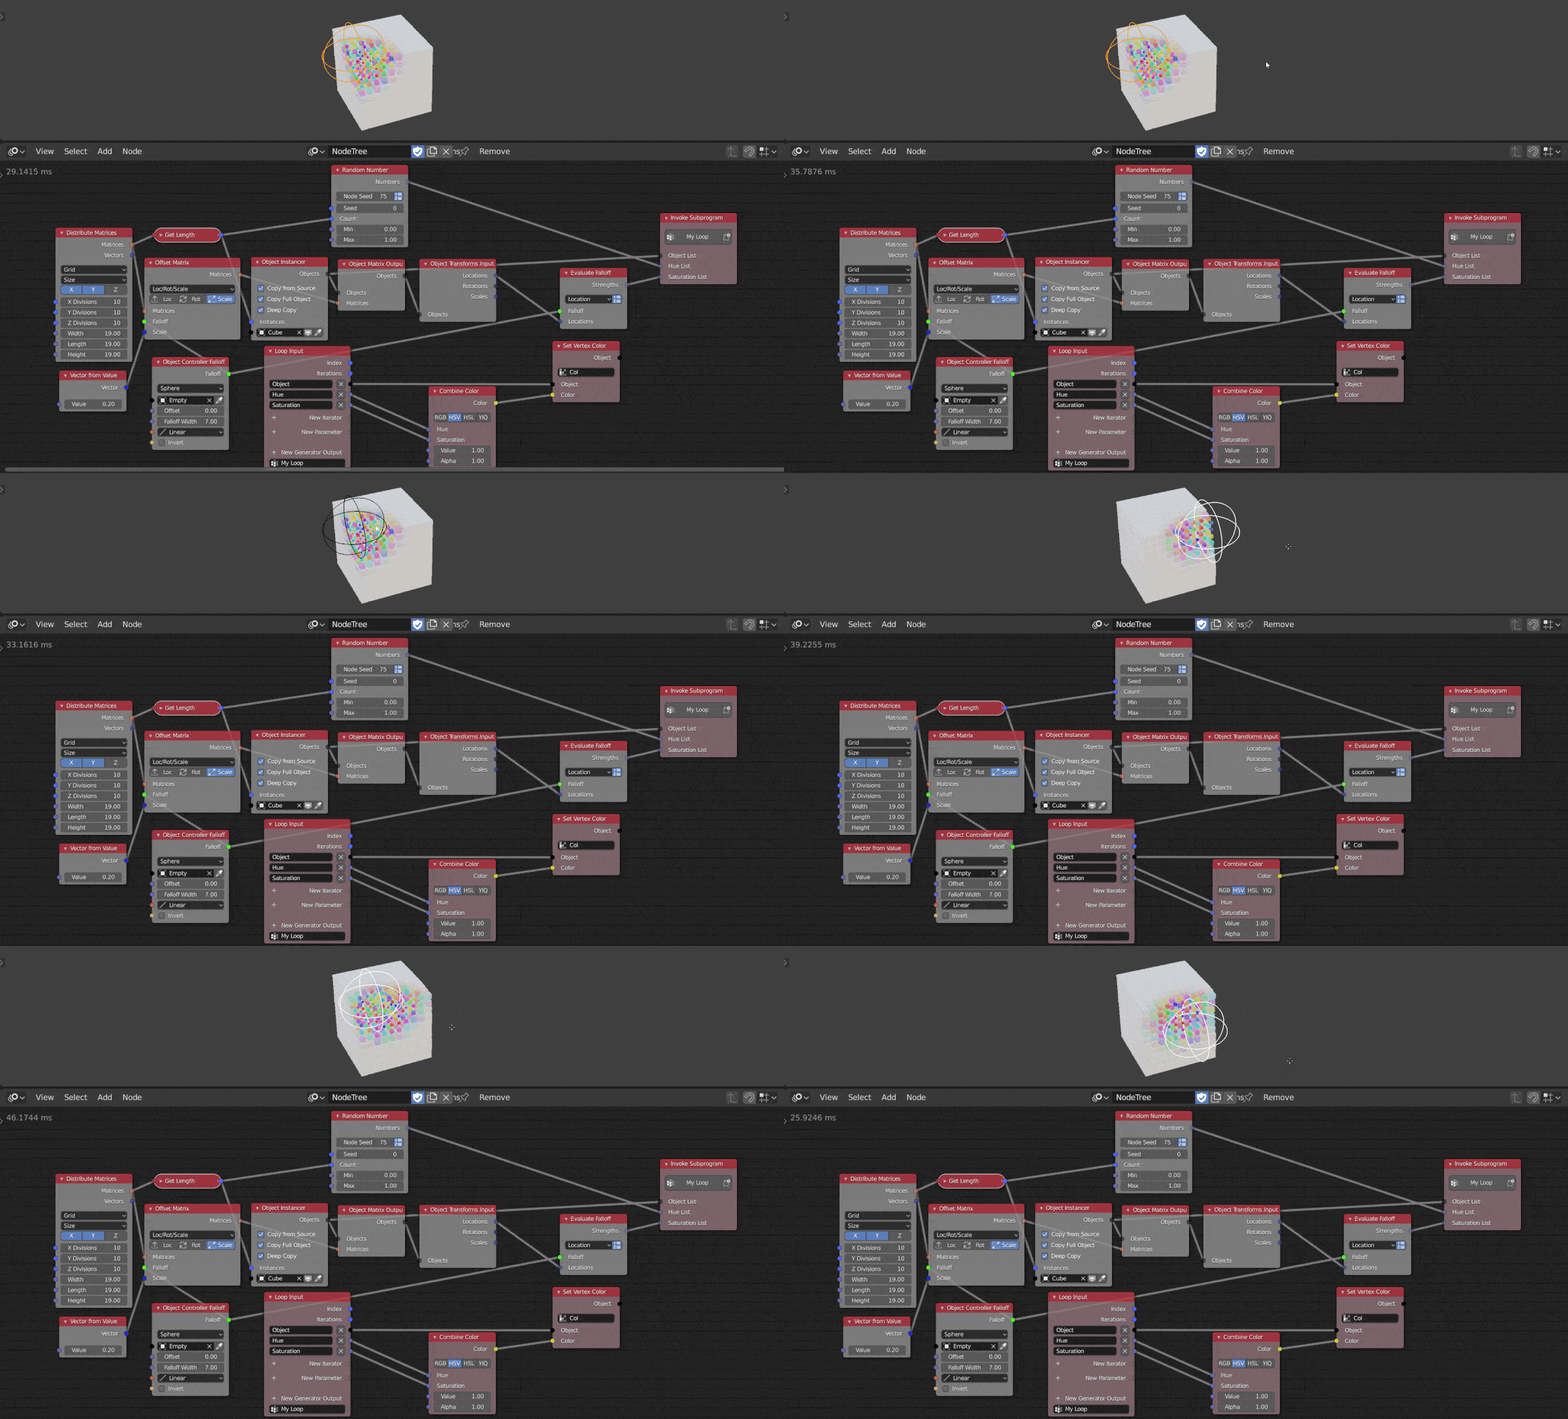
In this example, a 3D grid of cubes is generated and the effector object alters the scale and saturation of the cubes that fall within the effector radius. There's also a nice little falloff added in for a gradient effect. This example is a little advanced with the My Loop Subprogram cycling through vertex colors which is what you have to use if you have multiple colors and multiple objects.
One thing in particular to note, for the colours to work you first need to assign a material to your Cube then add the following node to your principle shader in the Shader Editor (Shift F3).
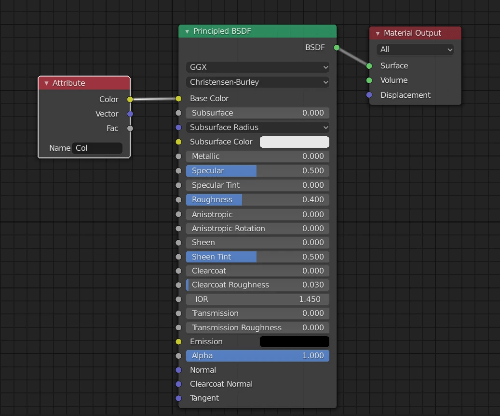
Then go into the Object Properties of your original Cube object and under Vertex Colours add 'Col'.
So, for the network, we start with a grid of points to specify the locations of our cubes using Distribute Matrices. Change the parameters to see how each separate one effects the grid.
The Offset Matrix changes the scale of the objects to 0.2 in our grid. We instance copies of our initial Cube object with Object Instancer to every point in our Grid using Object Transforms Input. Object Controller Falloff connected to the Evaluate Falloff gives us a fading effect in the colours randomly generated by the Random Number node which generates a list of numbers, called Hue List, according to the number of objects we have.
My Loop takes each randomly generated object and assigns it to the corresponding cube. The gradient effect in the saturation is also calculated depending on where the effector is. The objects within the effector have full saturation and the objects outside have none except for a small ring of fading colours at the effector edge.
A kind of Mexican Wave
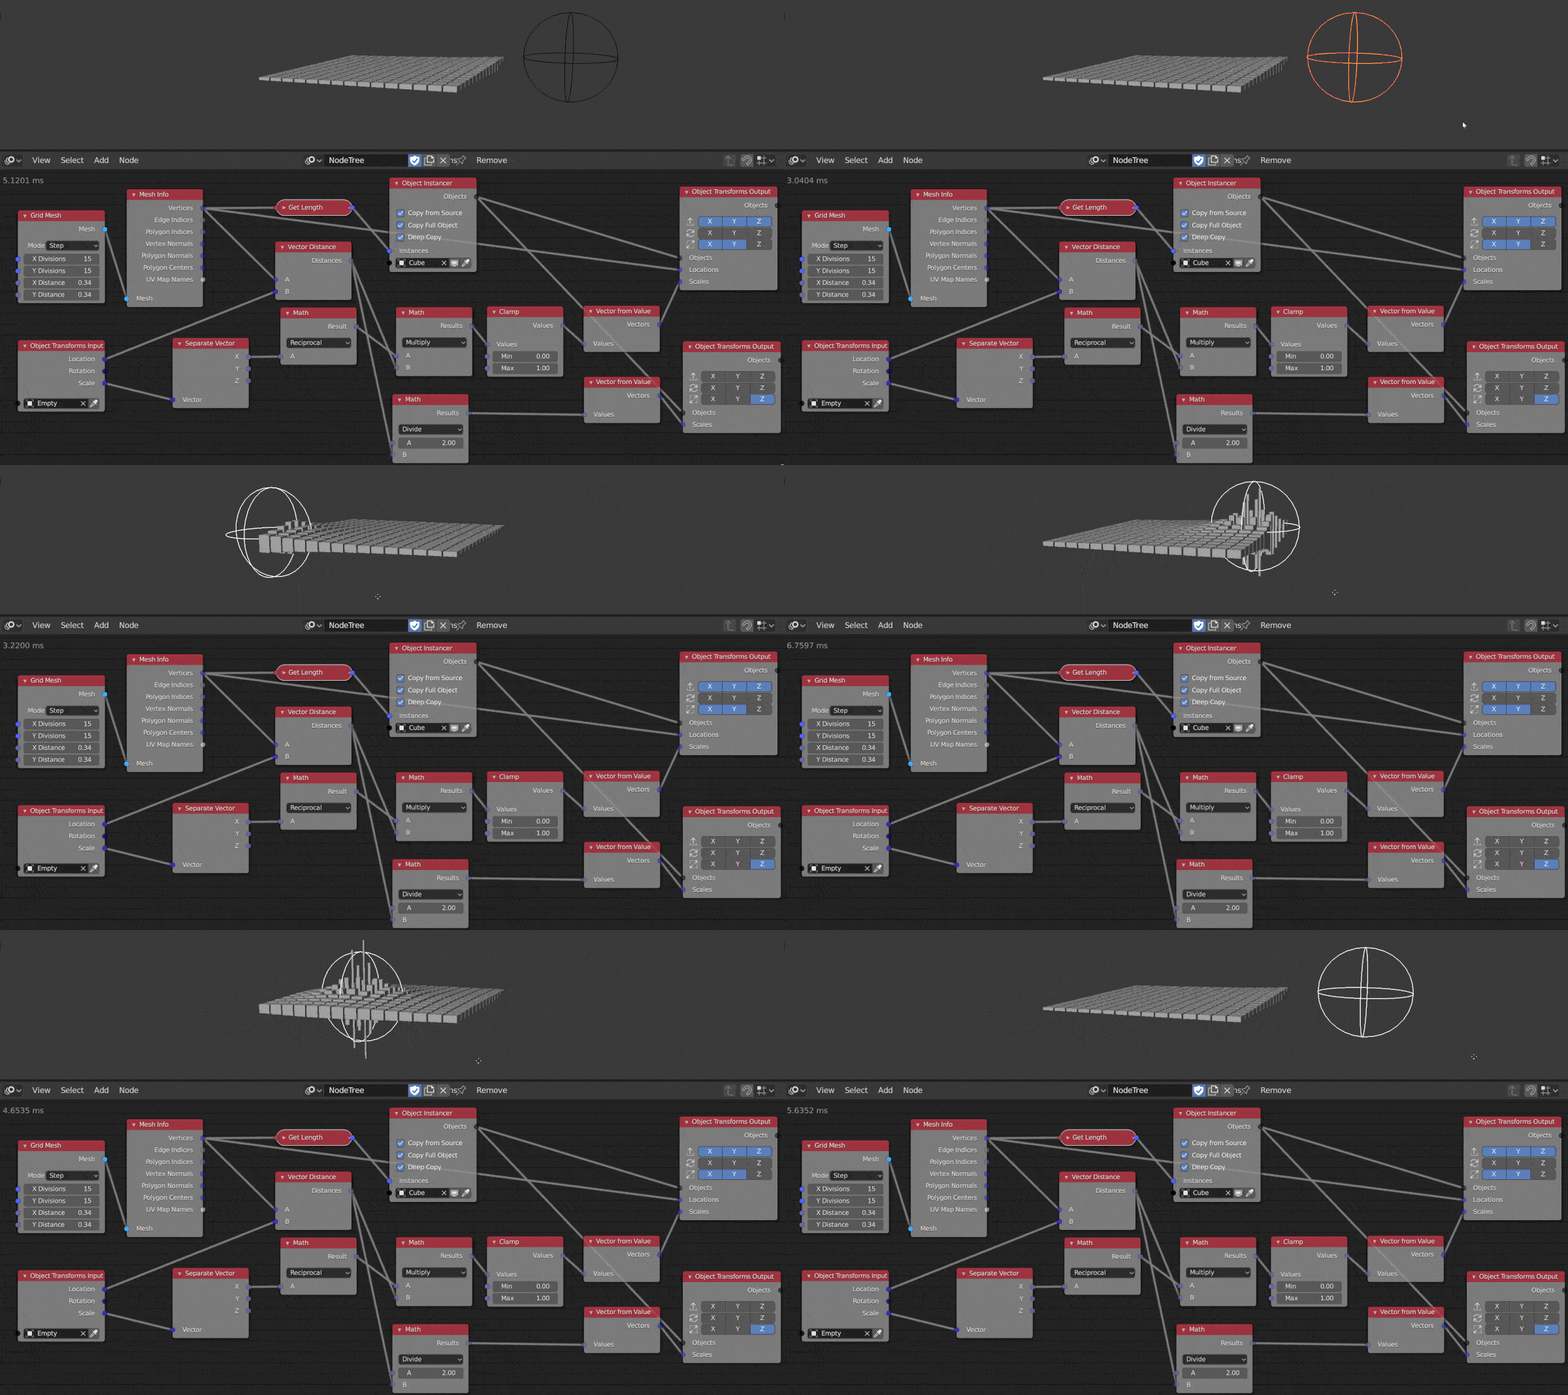
Here I created another effector setup that changes the scale of cubes depending on where the effector object is located. Note that I had to create a separate Object Transforms Output for the z scale of the cubes. I was getting strange behaviour when it wasn't separate. This is a similar concept to the previous example just without the colours or falloffs and a little more math.
Close Packed SPheres - requires Extra Nodes
The concept of close packing spheres and circles occurs in mathematics and materials science. The Animation Nodes + Extra Nodes version of AN comes with a close packing node which you can use to fill a region with spheres without any overlap.
In this network we're using a Vector Wiggle to introduce some random movement to our invisible close packed spheres. The Close Packing node lets us define the maximum radius of our spheres and the margin of contact between them. An empty sphere object defines the bounds of this small animation, notice how the rings are clustered? This is because they are confined within an effector object. We then use Replicate Splines to generate multiple bezier circles to adopt the positions of our invisible close packed spheres and use a Curve Object Output to extrude and bevel those circles to make the rings you see below.
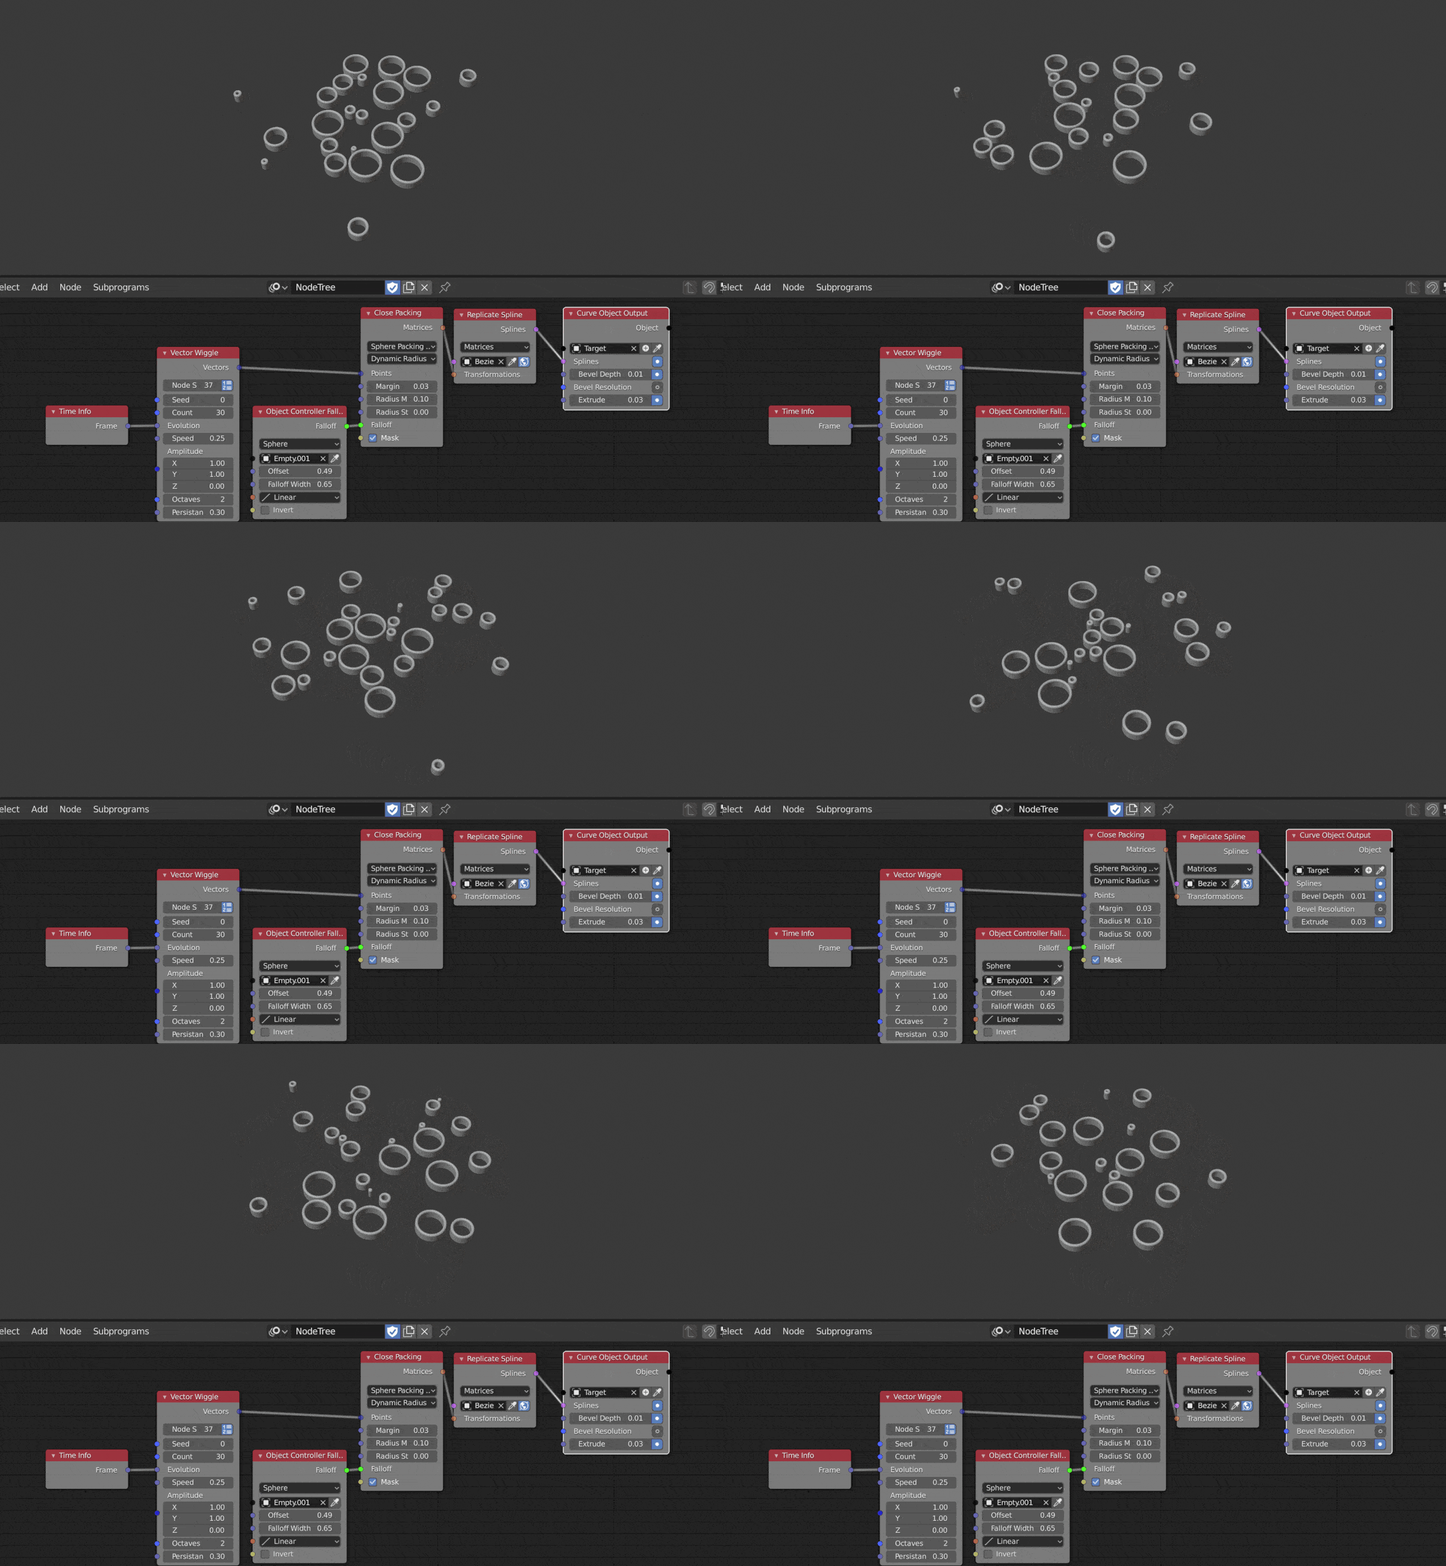
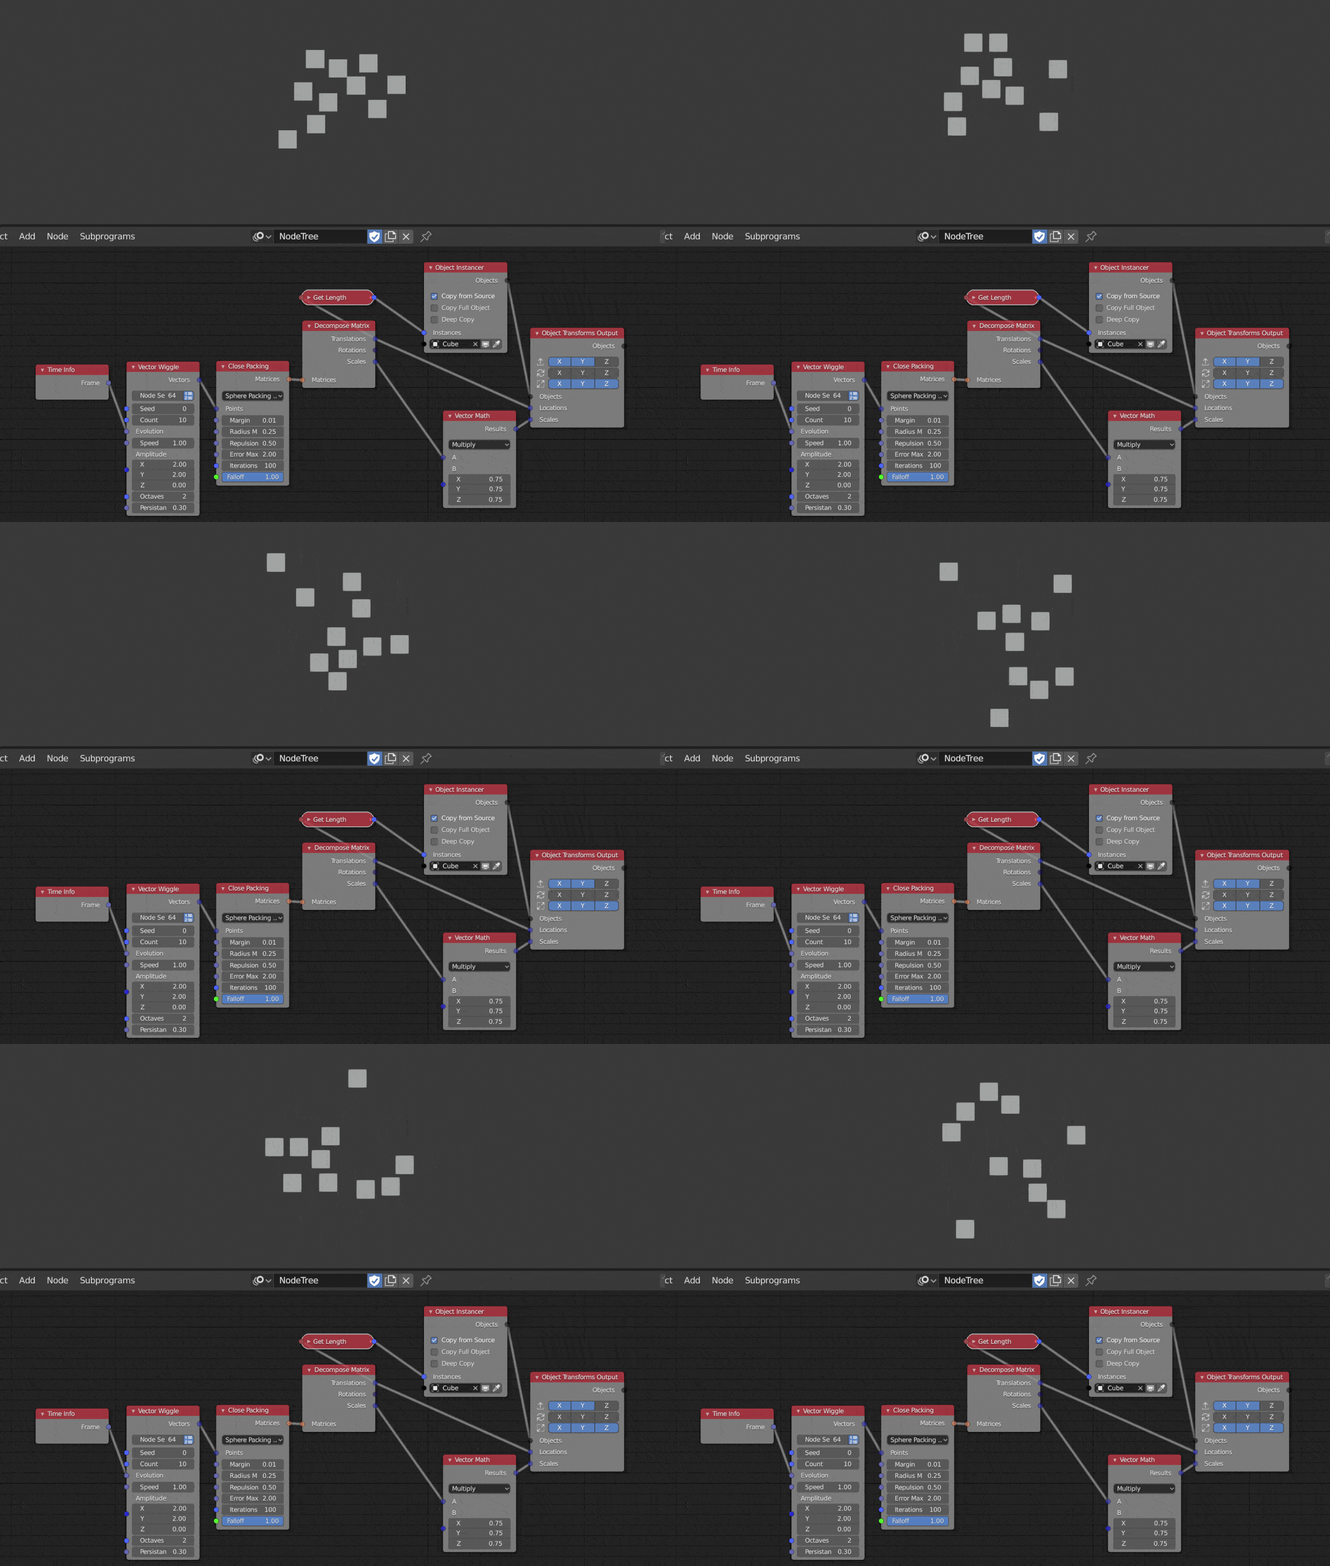
This is a similar version of the above but illustrates how to instance objects with the Close Packing nodes instead of replicating splines:
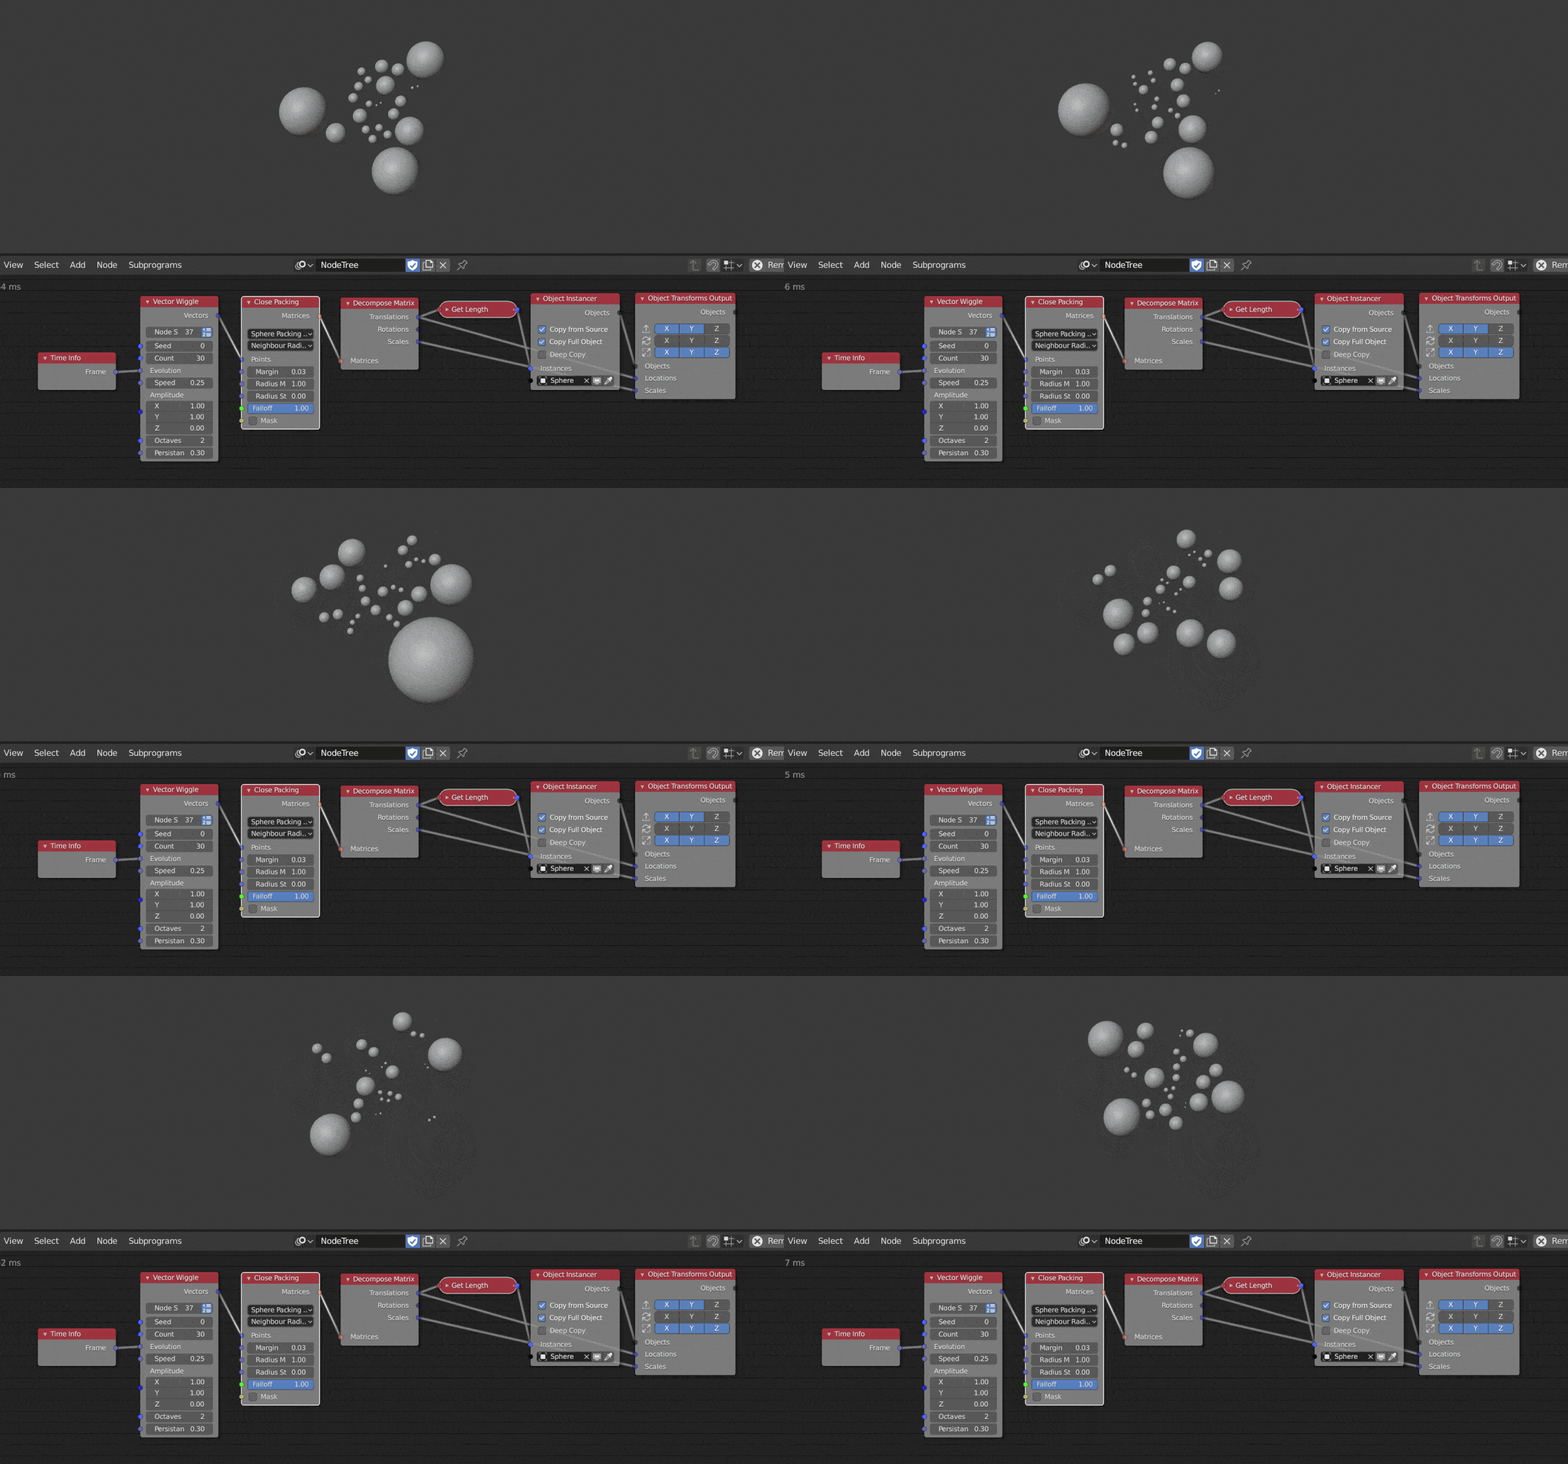
Collisions Work Around - Requires Extra Nodes
I've been trying to tackle collisions inside Animation Nodes. I haven't managed to successfully get rigid bodies and physics to work with instanced objects or managed to get a script working that can approximate collisions, but once I discovered the Close Packing node in Extra Nodes I realised it could be used as a work around. It works fairly well, it certainly isn't perfect but now if you don't want objects to phase through each other when working with AN we have a viable and relatively simple solution.
The close packing spheres generated by the Close Packing node become the 'effectors' for our collision animation. We introduce a Vector Wiggle for random movement, and a Close Packing node to generate a sphere packing effect. We then Object Instancer to create cubes equal to the amount of translations generated by the Close Packing node. We also use the scale vectors of that node to control the size of the cubes via a Vector Math node. Finally we map the translation and modified scale vectors to our instanced cubes.
Experiment with the margin and radius options to optimise the phasing that happens at the cube corners. Obviously objects that are closer to the shape of a sphere will get a more accurate collision. The sphere effectors created by the Close Packing node are like the bound objects used when you create rigid bodies in Blender. As you can see below, the collisions aren't perfect but they aren't so bad either, and the node network is relatively simple for the payout that is achieved.
