Animation Nodes is a node-based programming tool. If you're an experienced coder you will likely wonder about how to implement logic structures in more complex networks. While the basic logic of loops and logic structures is the same, the implementation of these concepts requires some small changes in thinking.
If Then Statements
For ordinary If/Then/Else logic (not case/elseif), Boolean nodes can be used. The nodes you'll generally use for this are Compare and Switch nodes.
Looping Squares
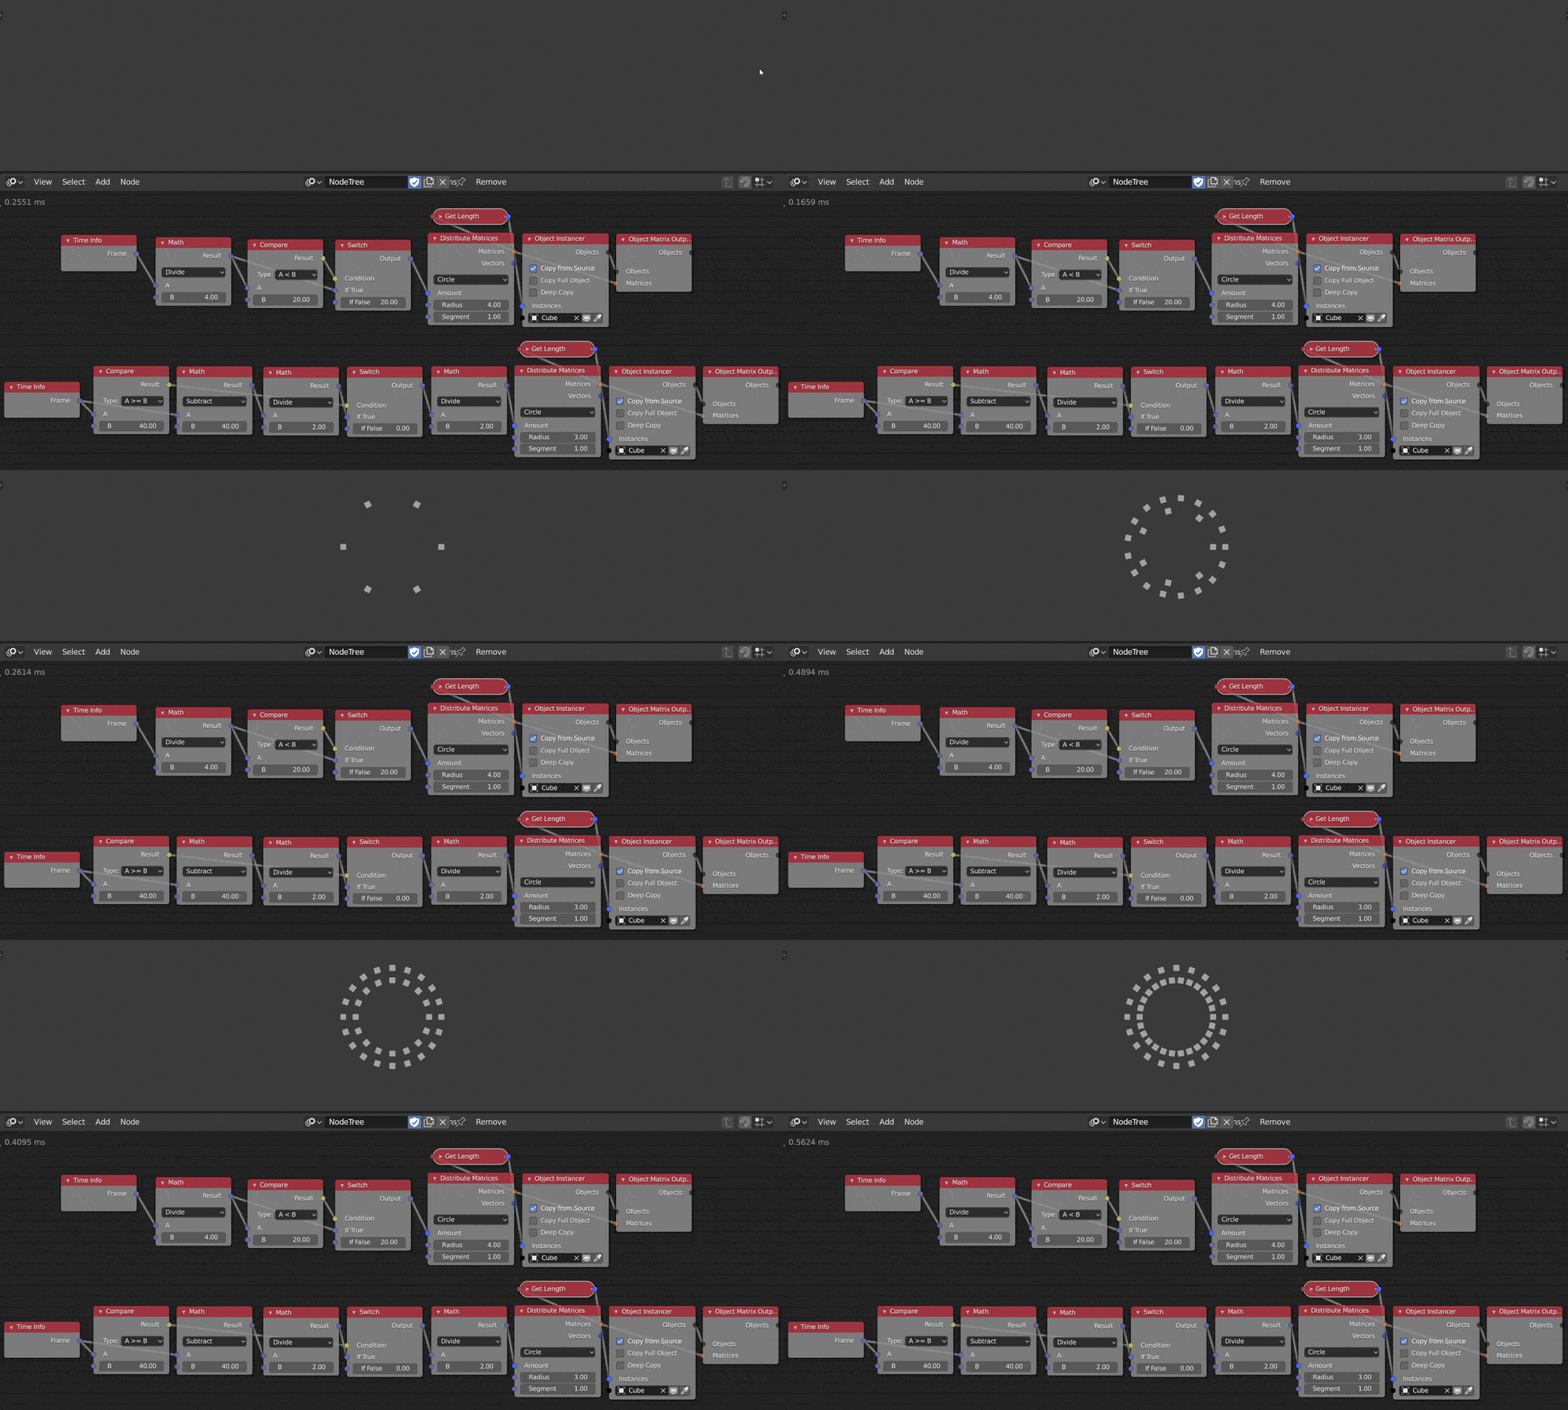
In the example below, I have used 2 sets of Compare/Switch nodes. The first network has a Compare A < B where A is the current Frame divided by 4 and B is 20. This node states our condition only. It does not check the condition or assign values depending on the result. The Switch node does these things. We feed our Compare condition into Switch which then returns a specific value depending on whether the result is true or false. Either number can be explicitly written in or can be supplied by other nodes.
I have not been able to successfully implement a case/elseif structure in AN but will update this section if I figure out how.
Rotating Gears
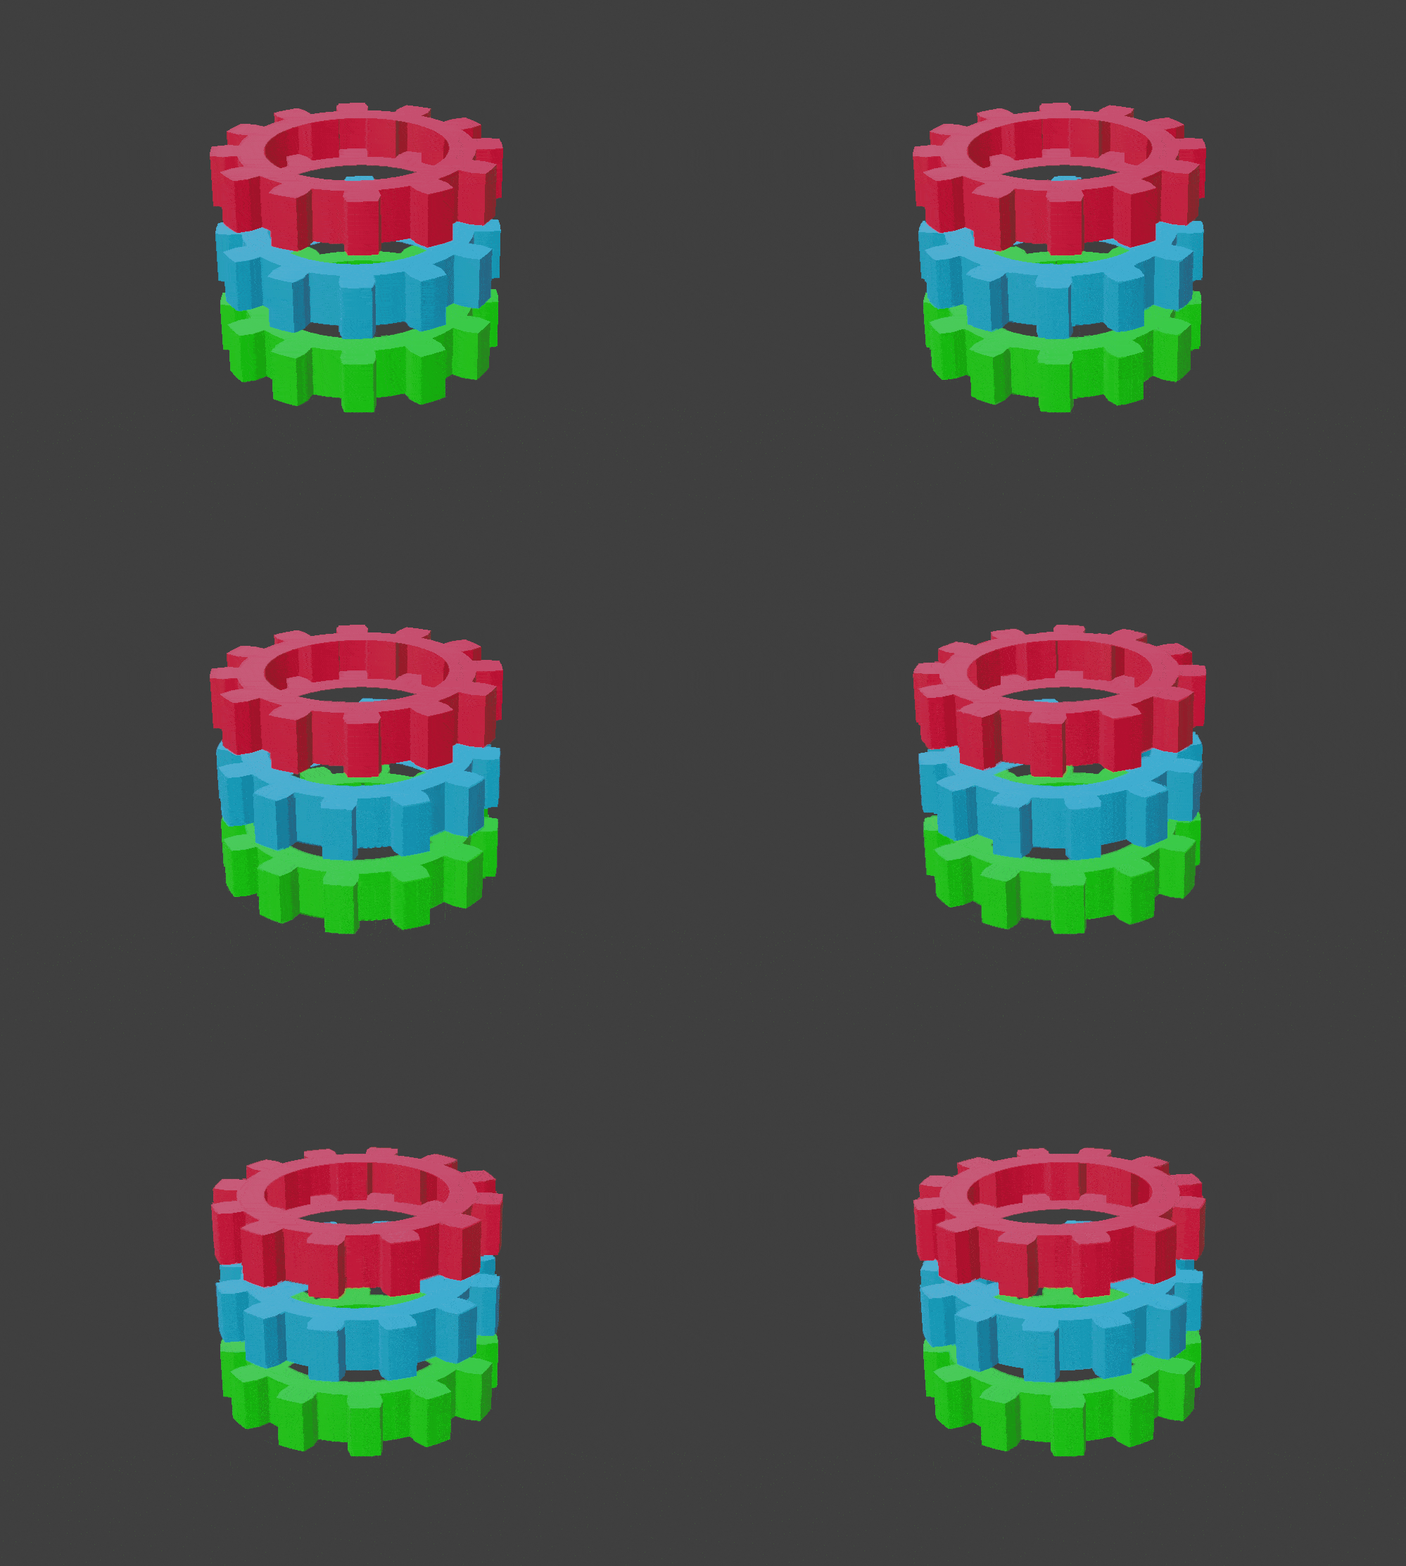
These rotating gears are a good exercise in If/Then logic as well as Euler nodes. Here, we have two branches in our network. One is telling AN to rotate the Green and Blue gears when the Frame number is below 45, and the other is telling AN to rotate the Red and Blue gears when the Frame number is above 45. In the Green and Blue example we're sending both gears the same value and direction of rotation but in the Red and Blue branch we're using a Quaternion Math (Conjugate) to get the same value but opposite direction rotation as can be seen in the gif below.

For Loops
Generally, the easiest way to implement for loop logic is to use Frame in combination with a Math node to emulate a range with even steps. Loop Subprograms are available but generally harder to implement. I have an example of such a Subprogram in the Effector Tutorial section.
2D Procedural Pattern Generation
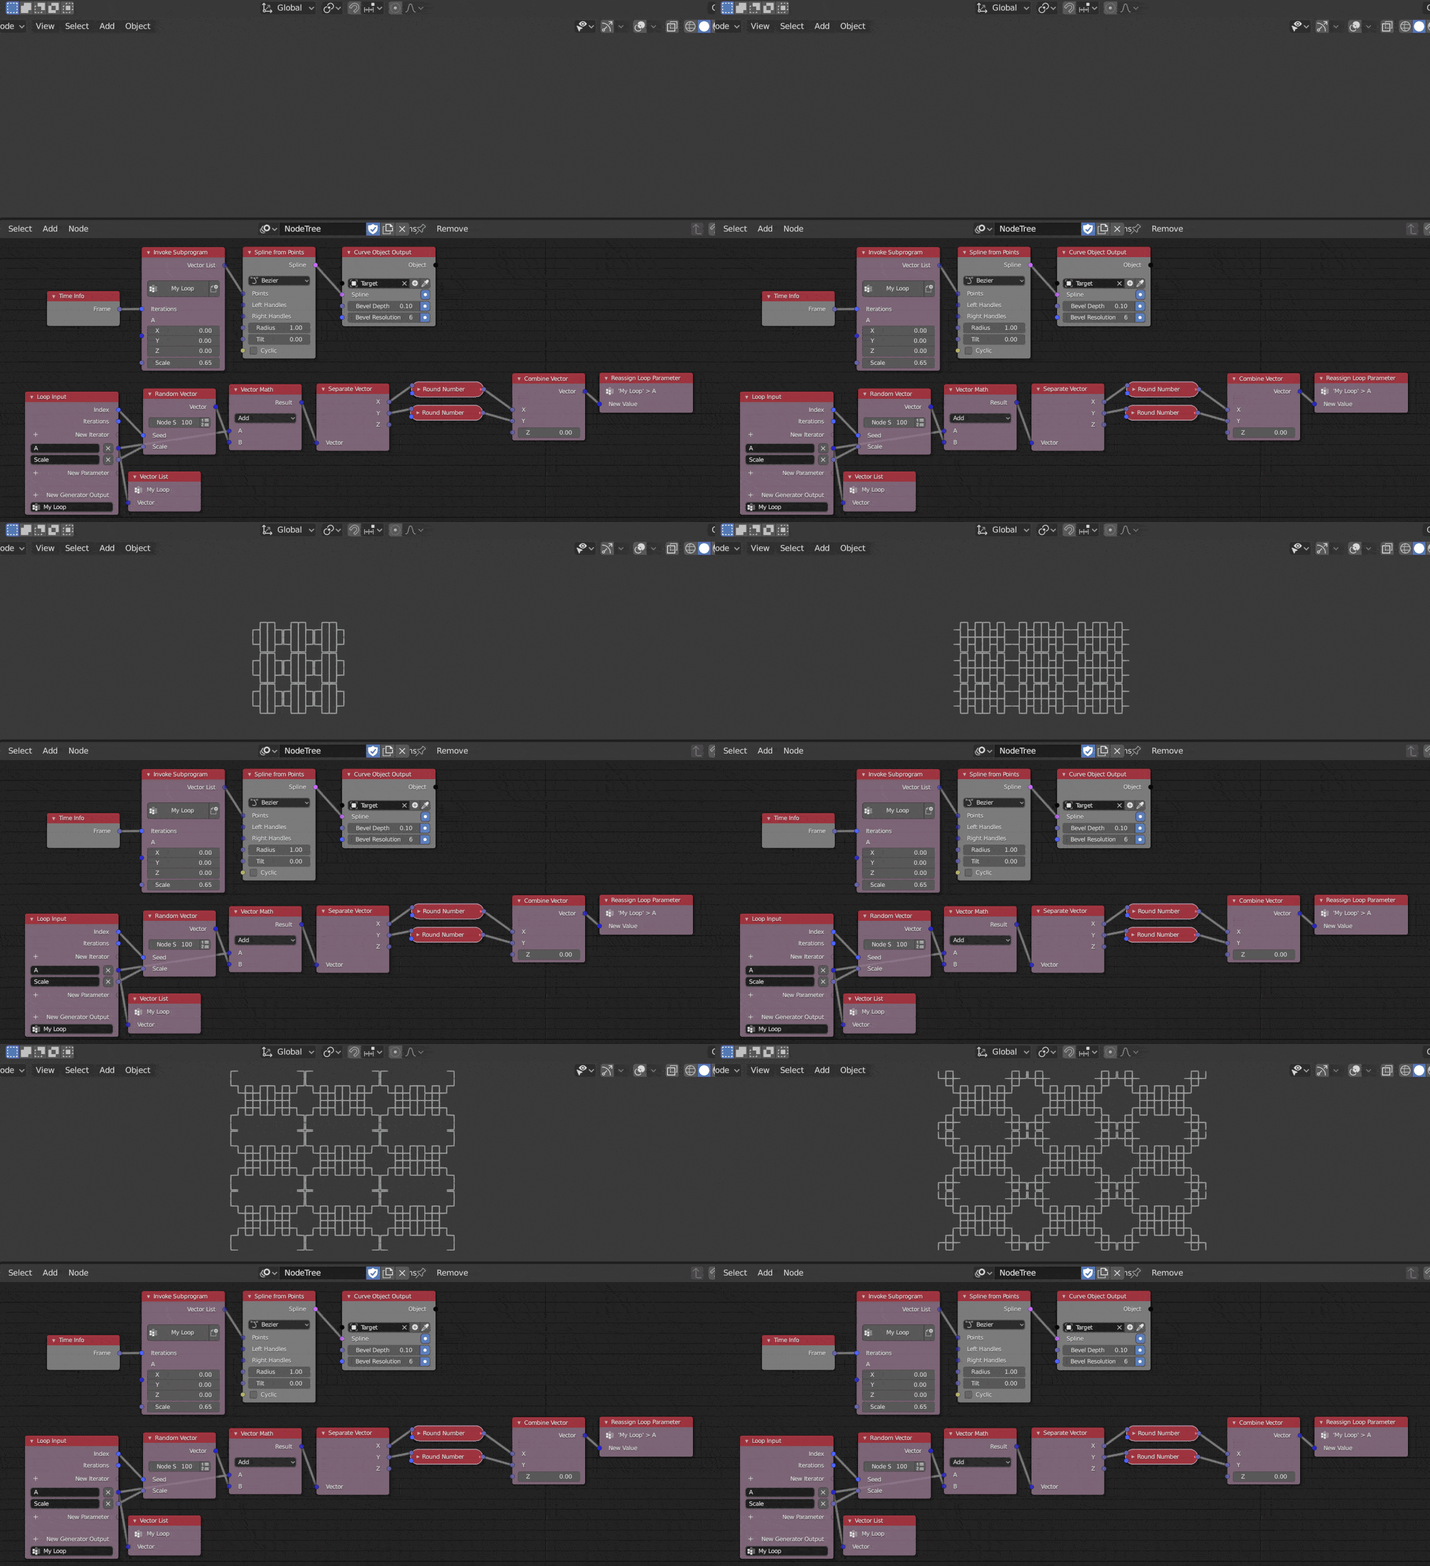
By emulating a basic random walk and applying some Mirror and Array modifiers, procedural patterns can be created in Blender. This method uses a Loop to continuously add randomly generated vectors to the path of the random walk. A new pattern gets generated at every Frame. The Scale parameter on the Invoke Subprogram node determines the shape of the pattern. At 0.65 and above the pattern generates splines only at 90 degree intervals (e.g. 90 and 180). At 0.65 and below the pattern generates splines at 45 degree intervals (e.g. 45, 90, 135, 180). The mirror modifiers are applied on the x and y axes only. The z axis only really determines the thickness of the splines so I would hesitate to call this a 3D procedural pattern. I've also added some array modifiers to tile the pattern. If you're unsure, set the modifiers to the 'Target' object which is obtained by clicking on the '+' icon on the Curve Object Output node.
Looping through Lists
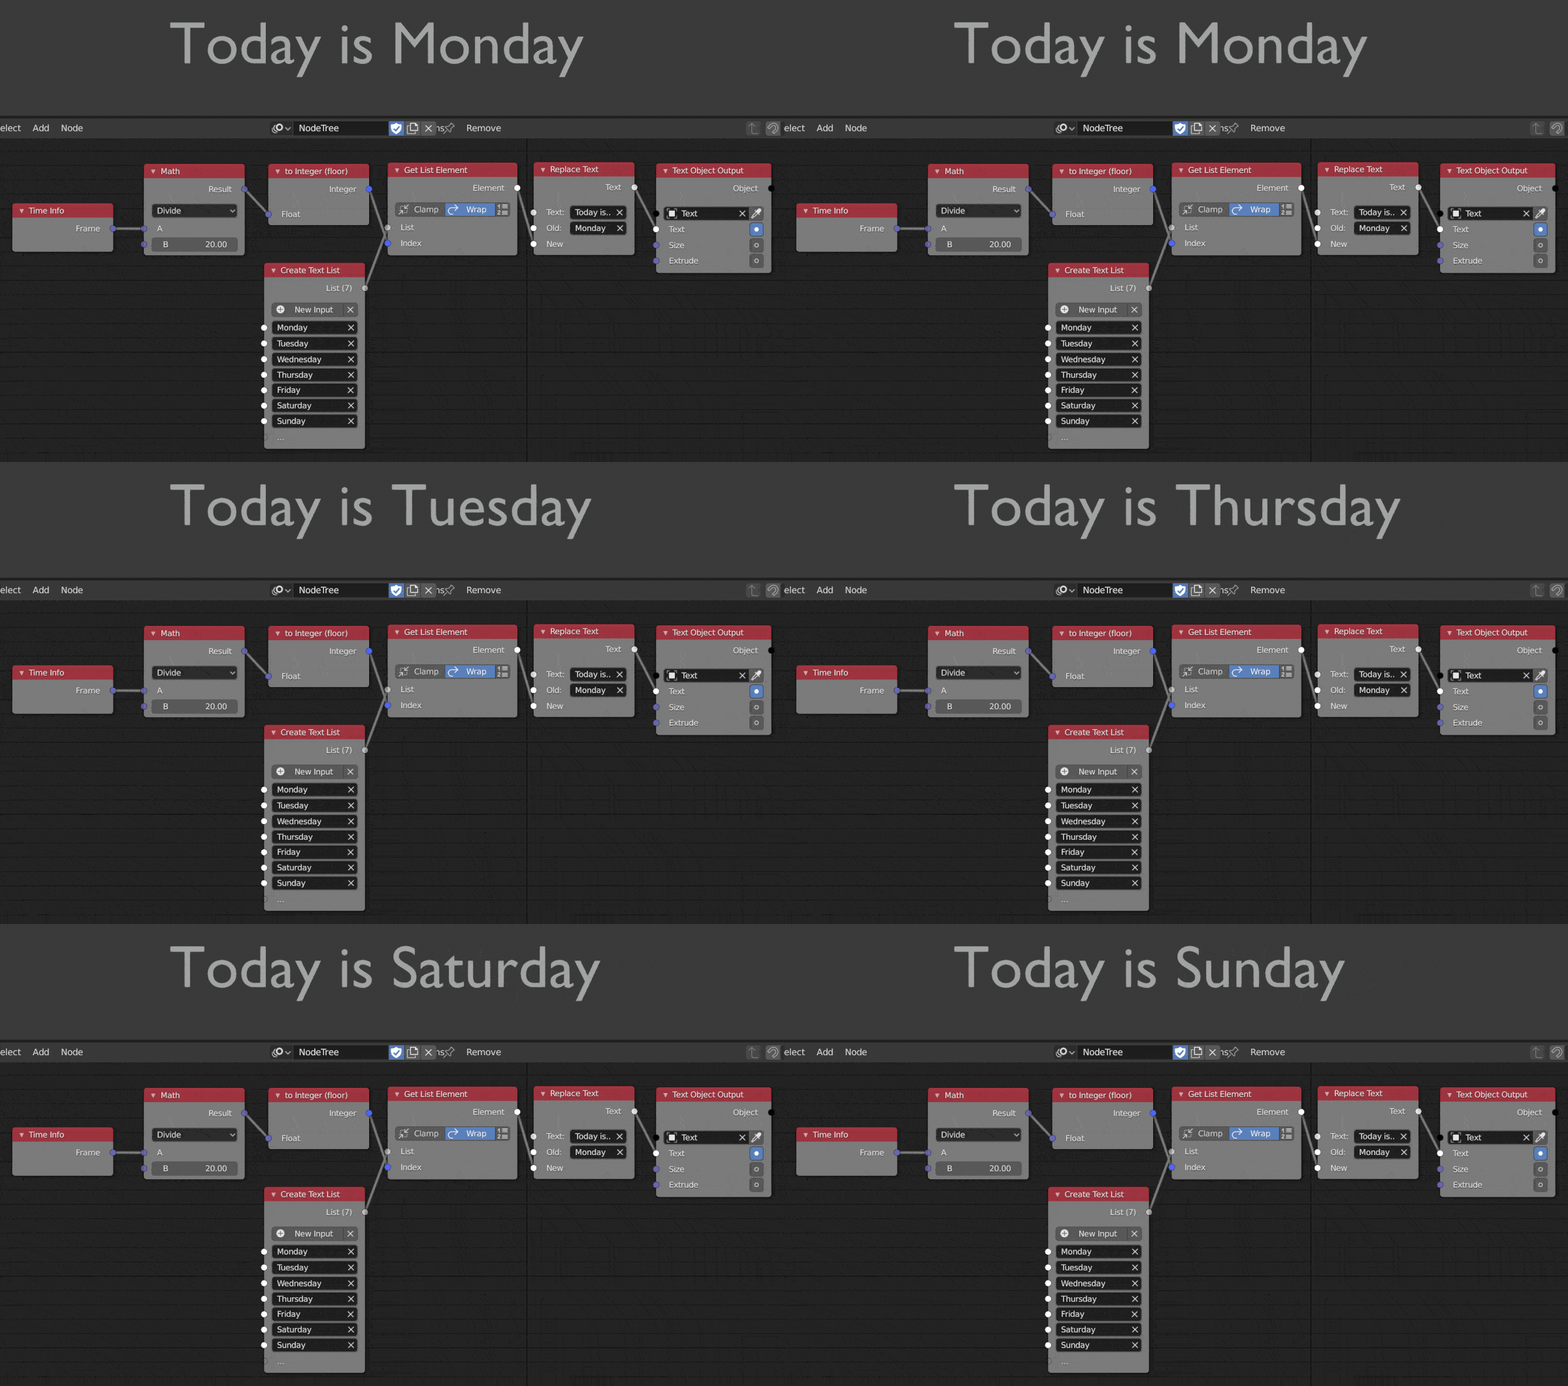
The best way to loop through lists in AN (as far as I can tell) is via indexing. You can create different kinds of lists within AN but I am unsure whether the items in that list can be of different type. Use the Frame node like a for loop, divide with a Math node to slow the animation down and stick the result through a to integer node. That will cycle through any list you have. I have an example below which has a full explanation under the same heading in the Text Tutorials section.
Changing Text
Unfortunately for us Python, the programming language used in Blender and AN is zero indexed. So, if we use our earlier example, this means that if we want the first item in our text list (Monday) then we actually have to set index to 0, not 1. If we do set index to 1 we'll get Tuesday instead of Monday. This is a bit annoying and counter-intuitive but it's something you'll get used to with practice.
List Slicing
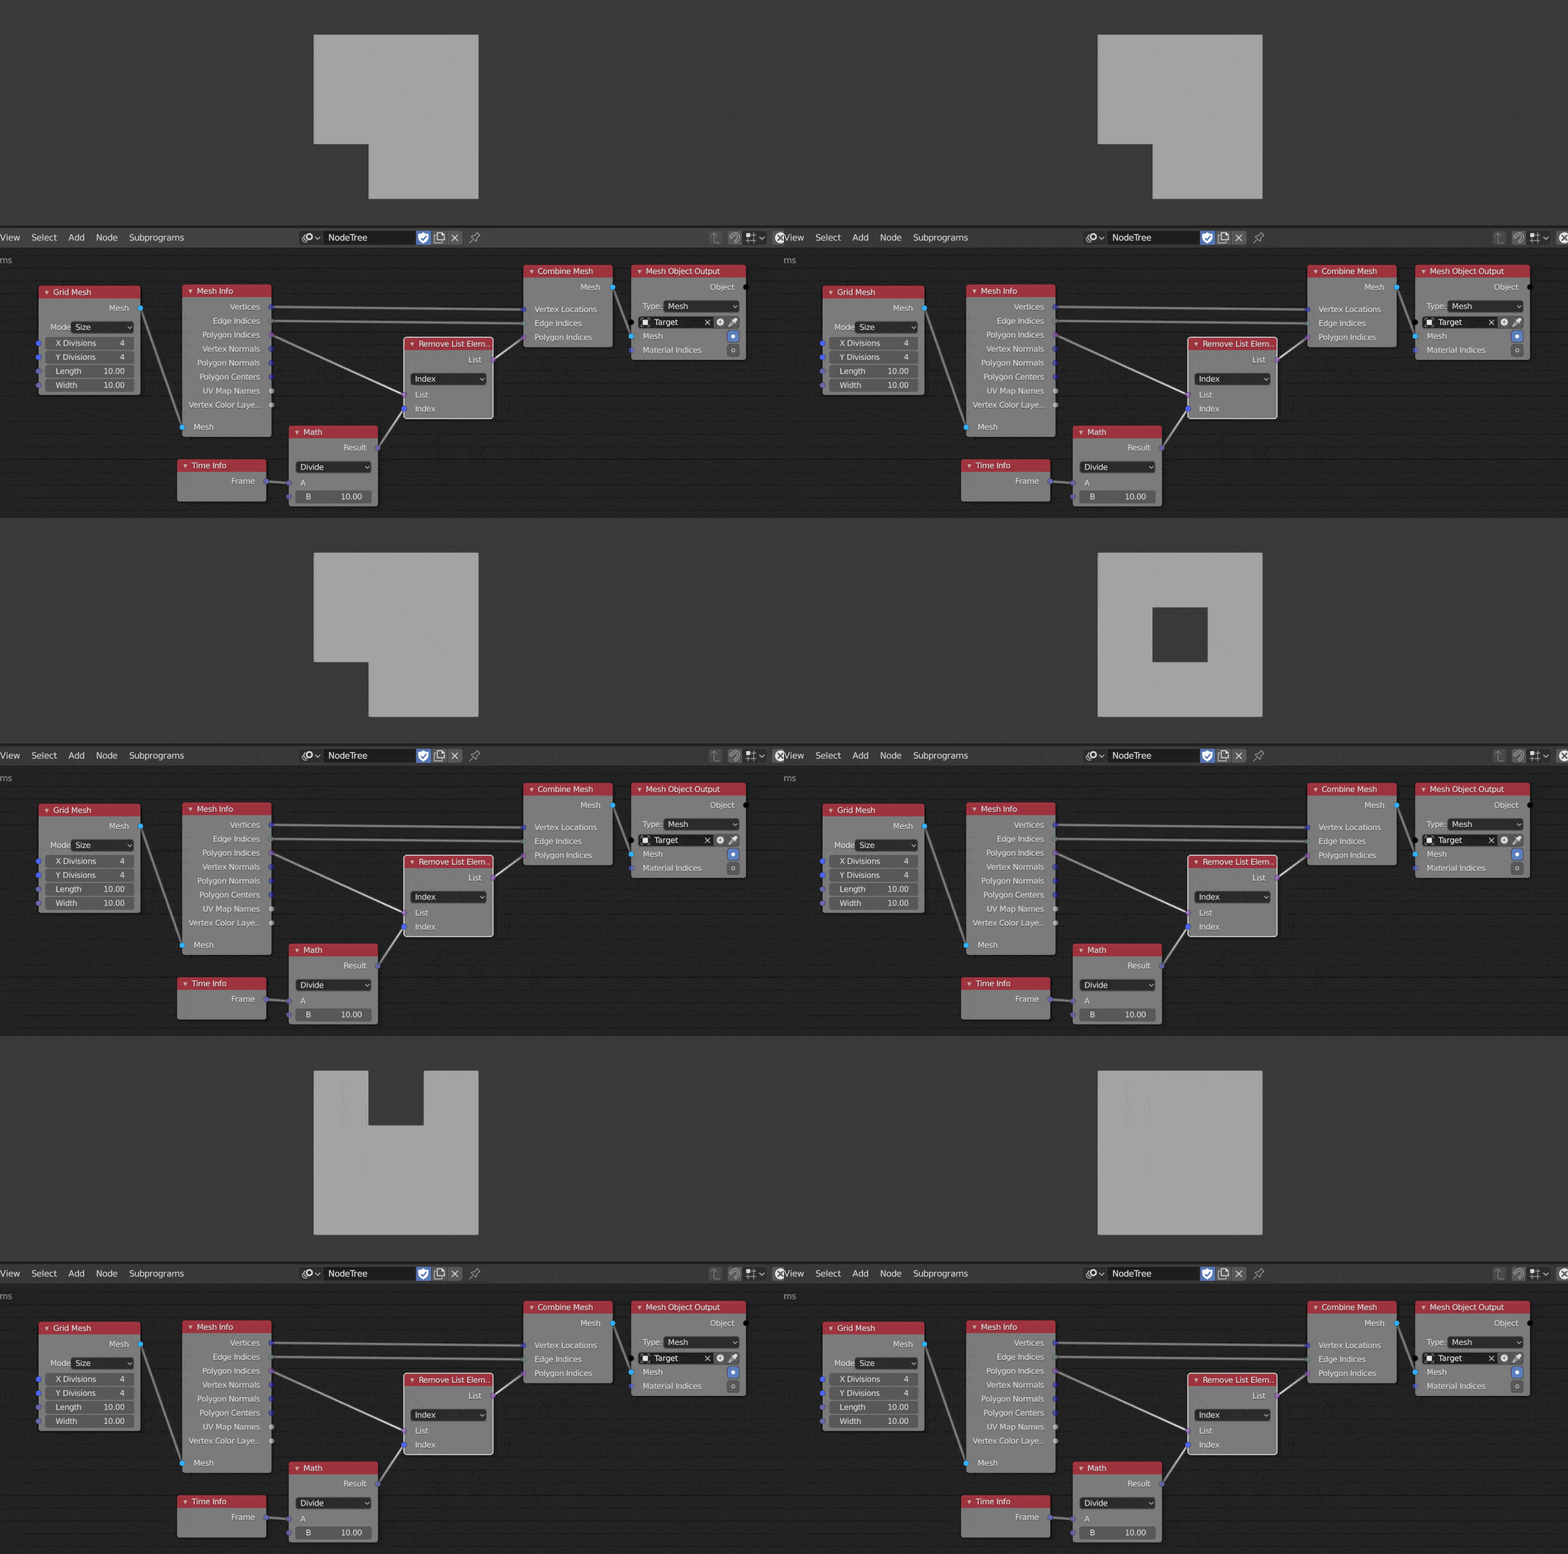
I've recently been working on a new series and have been playing around with list and mesh nodes quite a bit. I've made some simple gifs below to reference how to index through polygon indices lists to manipulate mesh properties.
This first example illustrates indexing in a rather simple manner. We start with a Grid mesh, get it's Mesh Info and cycle through the indexes of the Polygon Indices list to create holes in the Grid, and create the simple animation below. The Math node only serves to slow down how fast this is happening. We then feed the Grid mesh's vertexes, edges and polygons back into the Combine Mesh node and use Mesh Object Output to view the result.
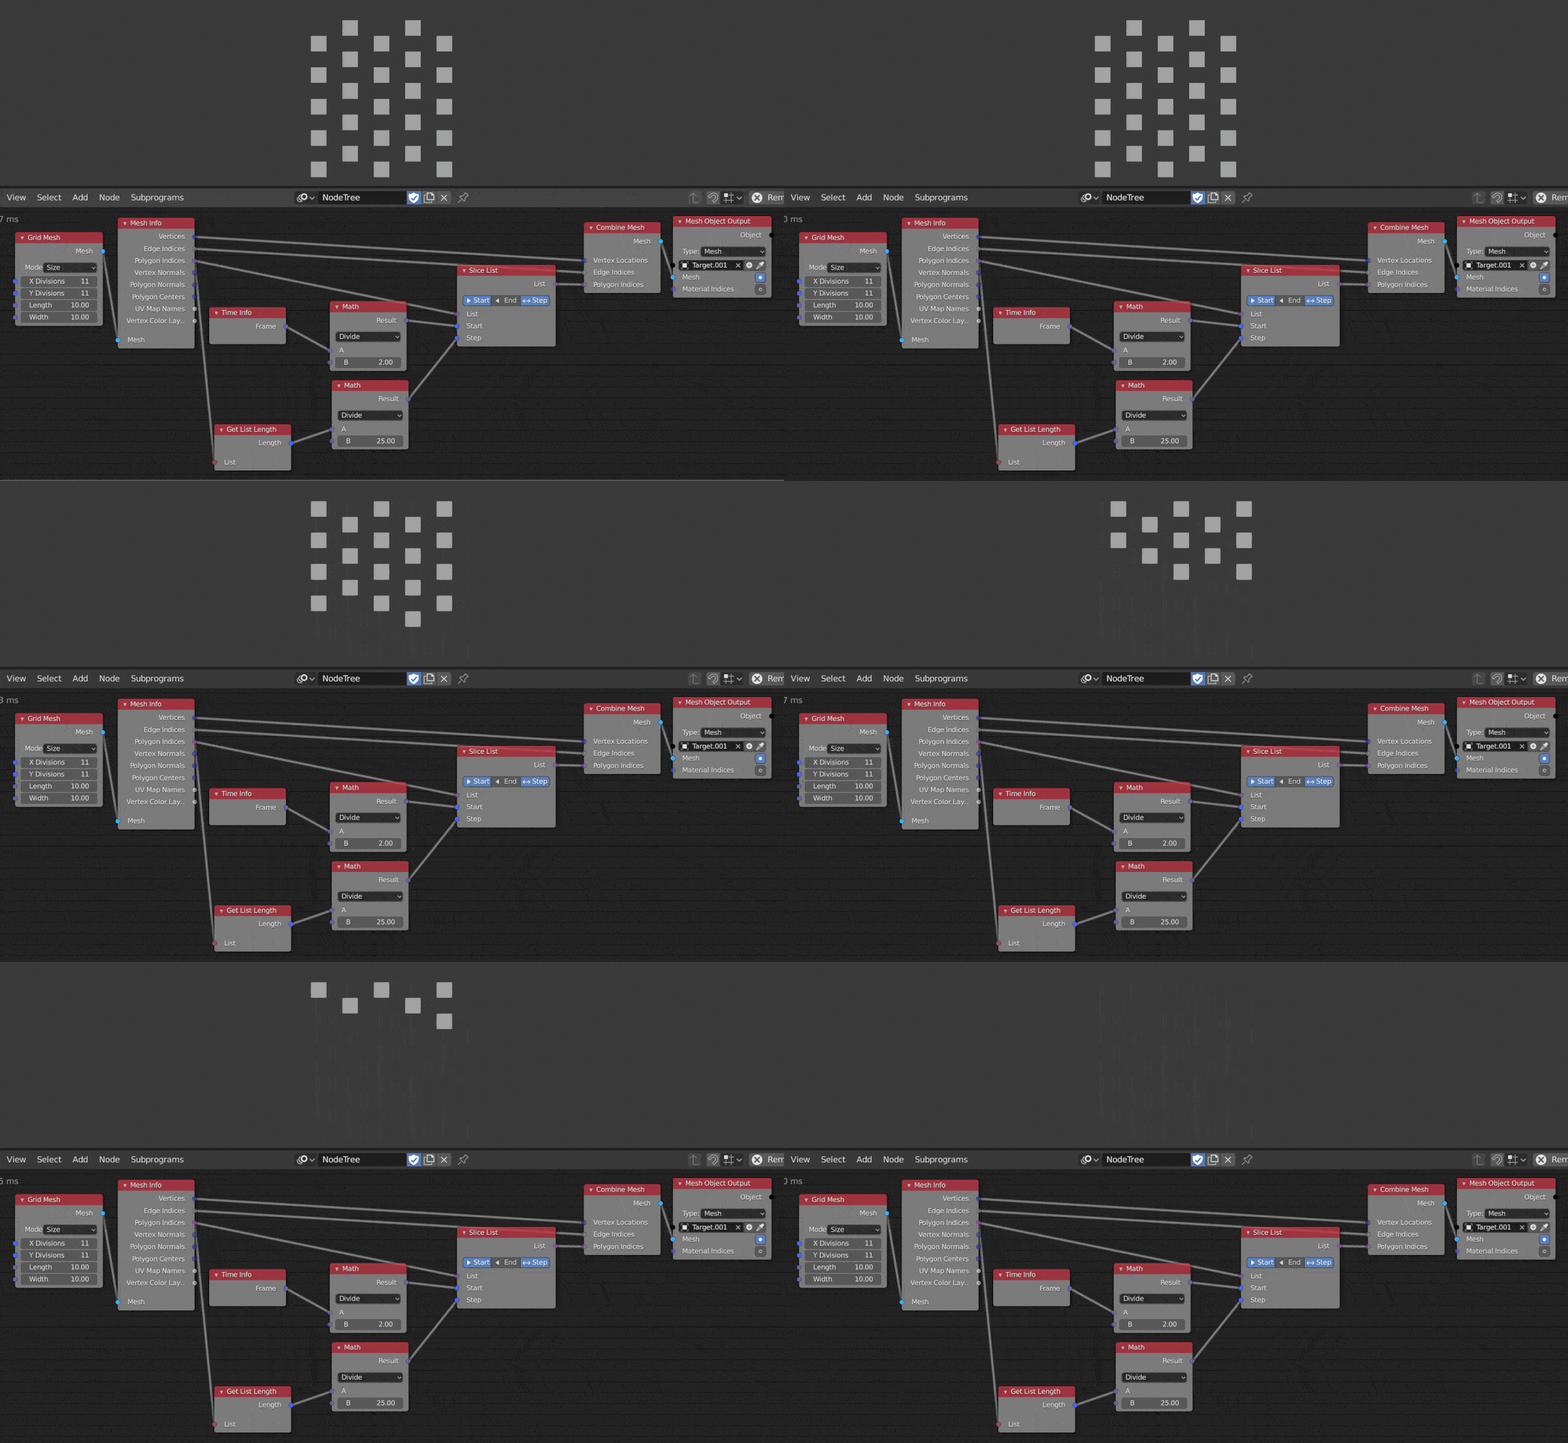
This second example is similar to the first, however, the polygons we remove stay removed. Using the Remove List Element node via index only allows for a single polygon to be removed at a time, in the gif below we're using a Slice List node to remove multiple polygons. This setup is similar to the above with the only real change being in the Slice List node. We feed the list that we want to slice in the first input, get the Length of that list and feed that into 'End' and then we use Frame and Math to increase the 'Start' value over time.
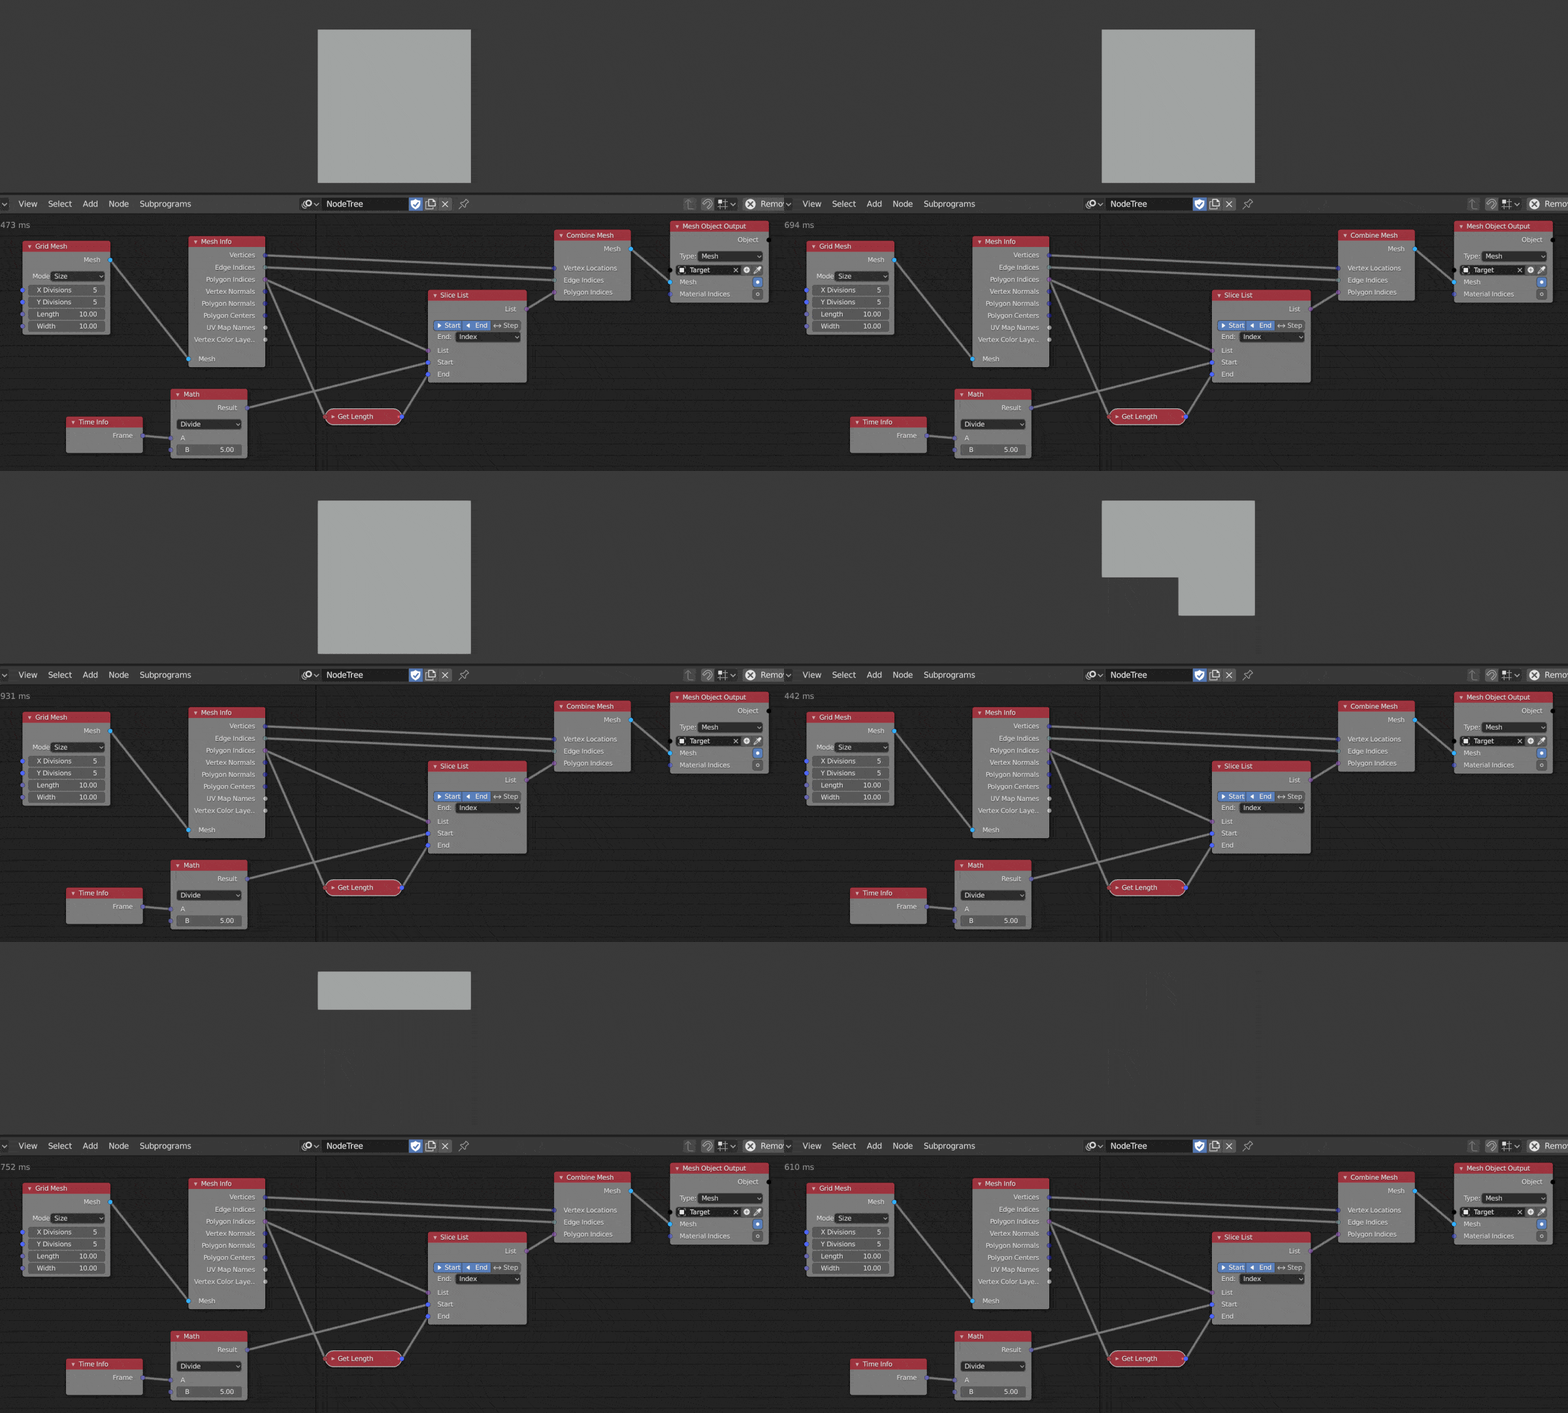
Slice List also has the 'Step' option which we can use to make some funky 2D animations, like the one below. You can change the number in the Math node piped into 'Step' to get different patterns. :)
