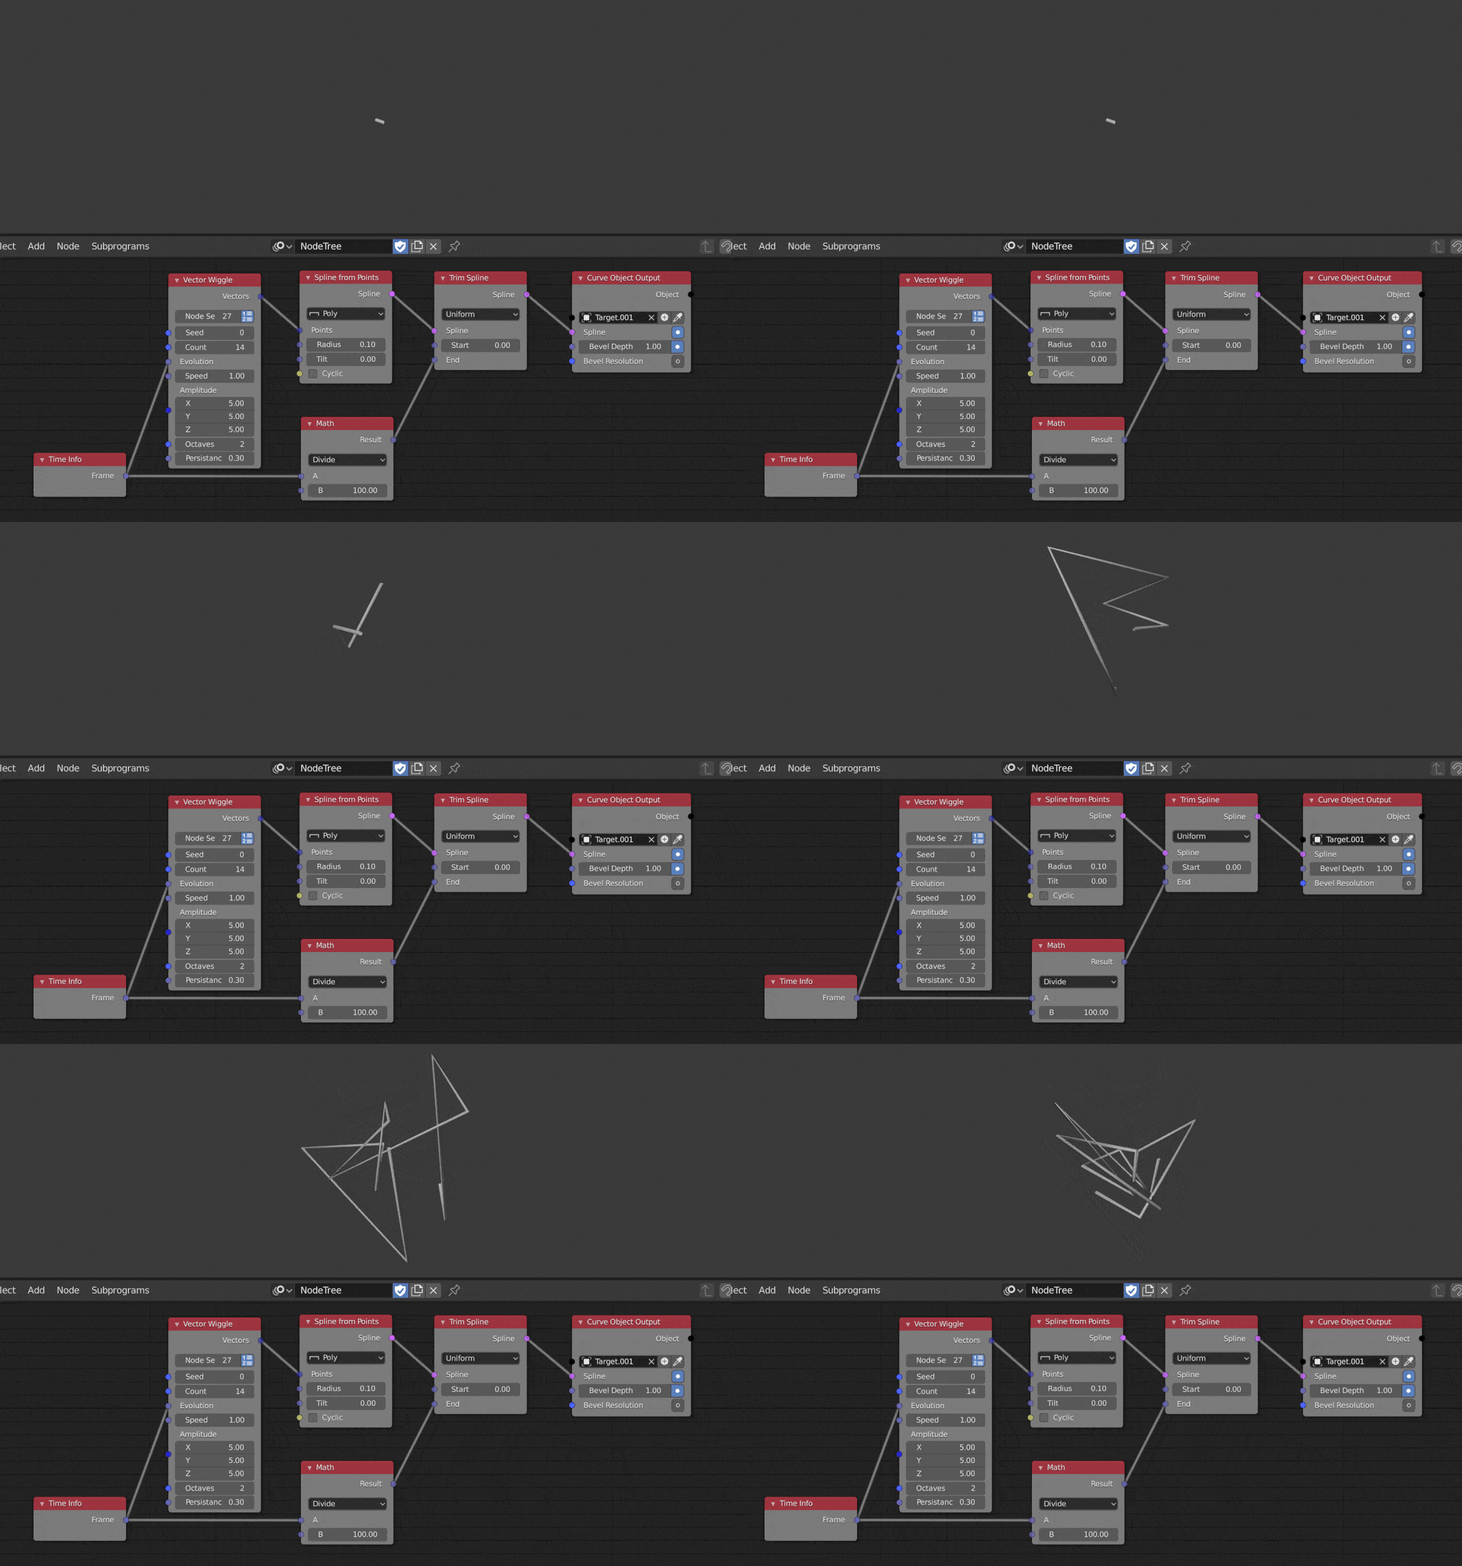
Vectors have a magnitude and direction are fundamental to 3D/CG/VFX. They are used to describe the locations, rotations, scale and many other properties of objects within a scene. Thus, we can use vector nodes to create a multitude of effects.
Simple Sine Animation
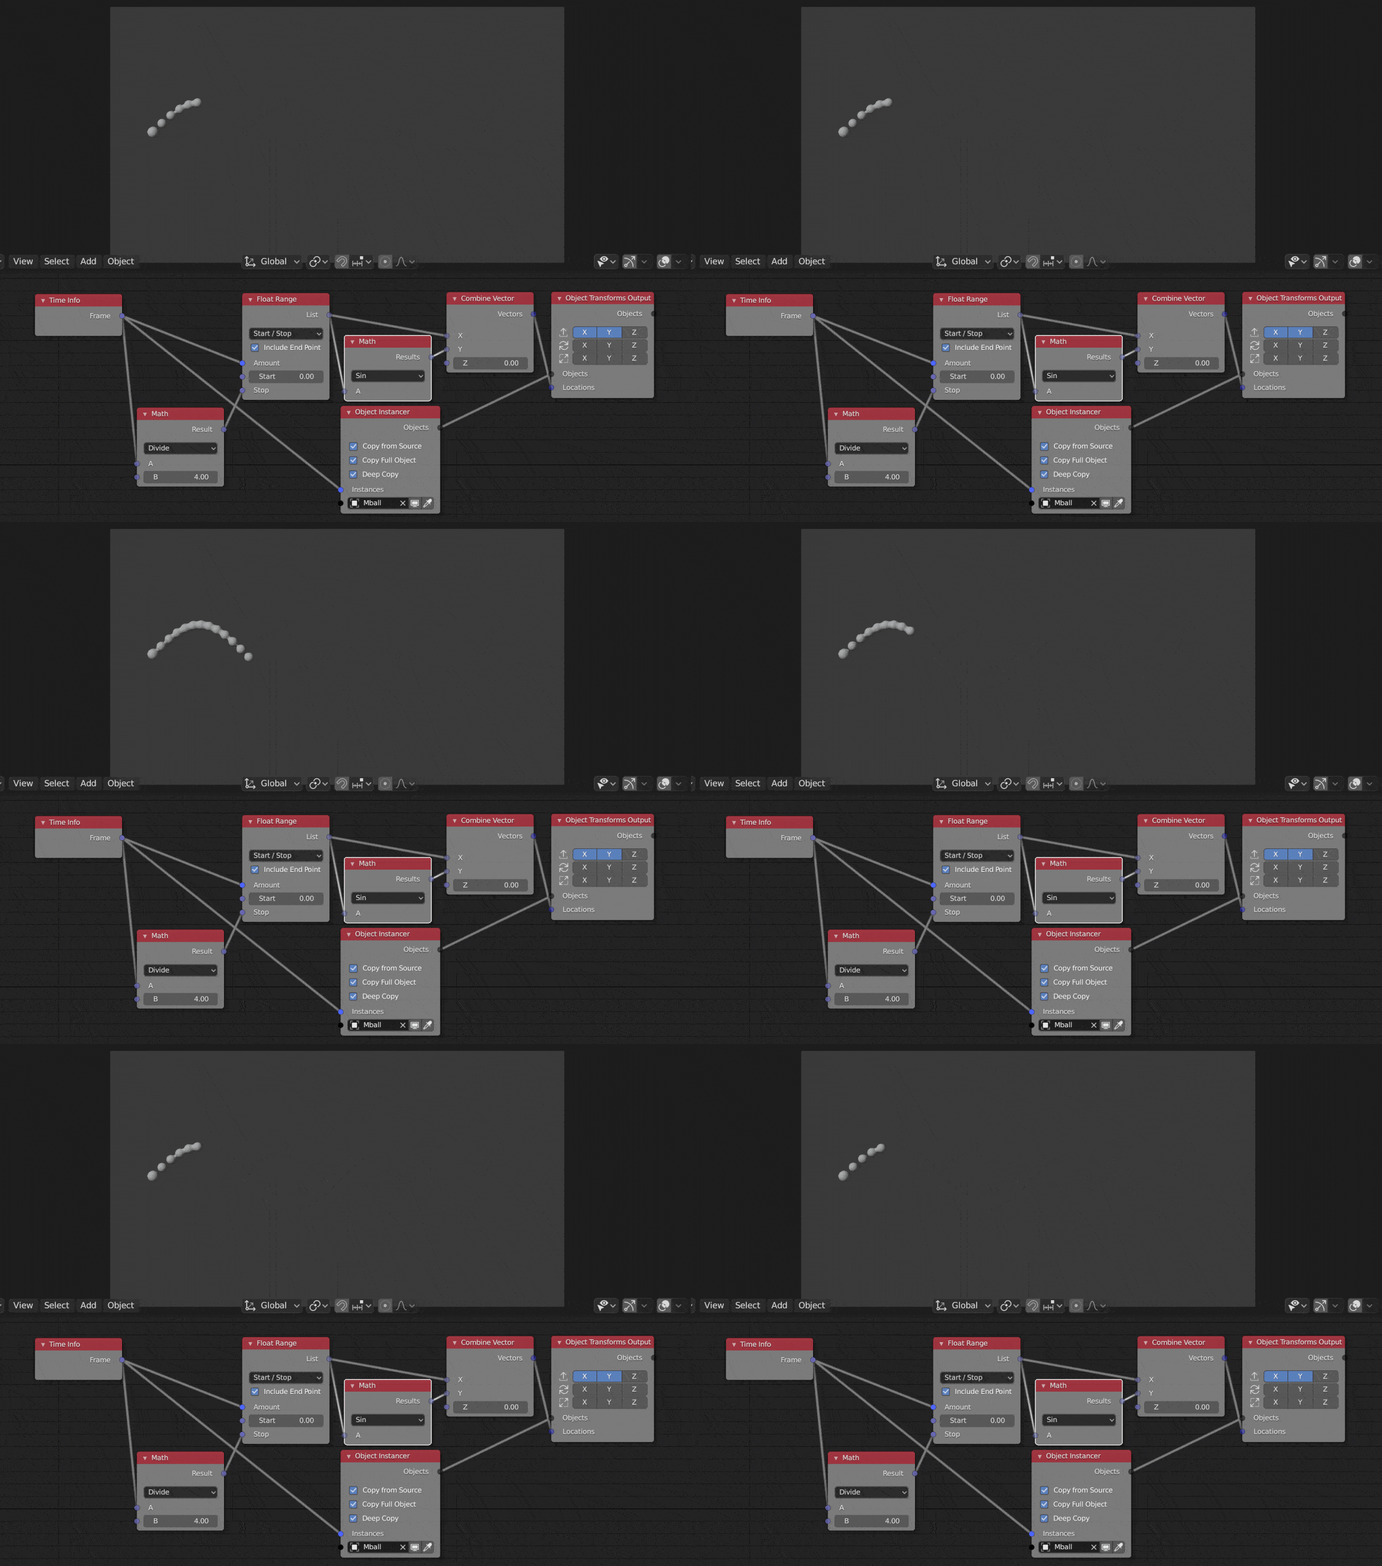
Here's a very simple example of how to use a sine function with a Combine Vector node. This is viewing the animation from top view so that's why the transforms output doesn't account for the z axis. The Float Range creates a list of points so we can have multiple metaballs instead of a singular metaball moving along the path of the sine function. The Transforms Output generates an object at each of these points.
Fake Ocean/Cloth
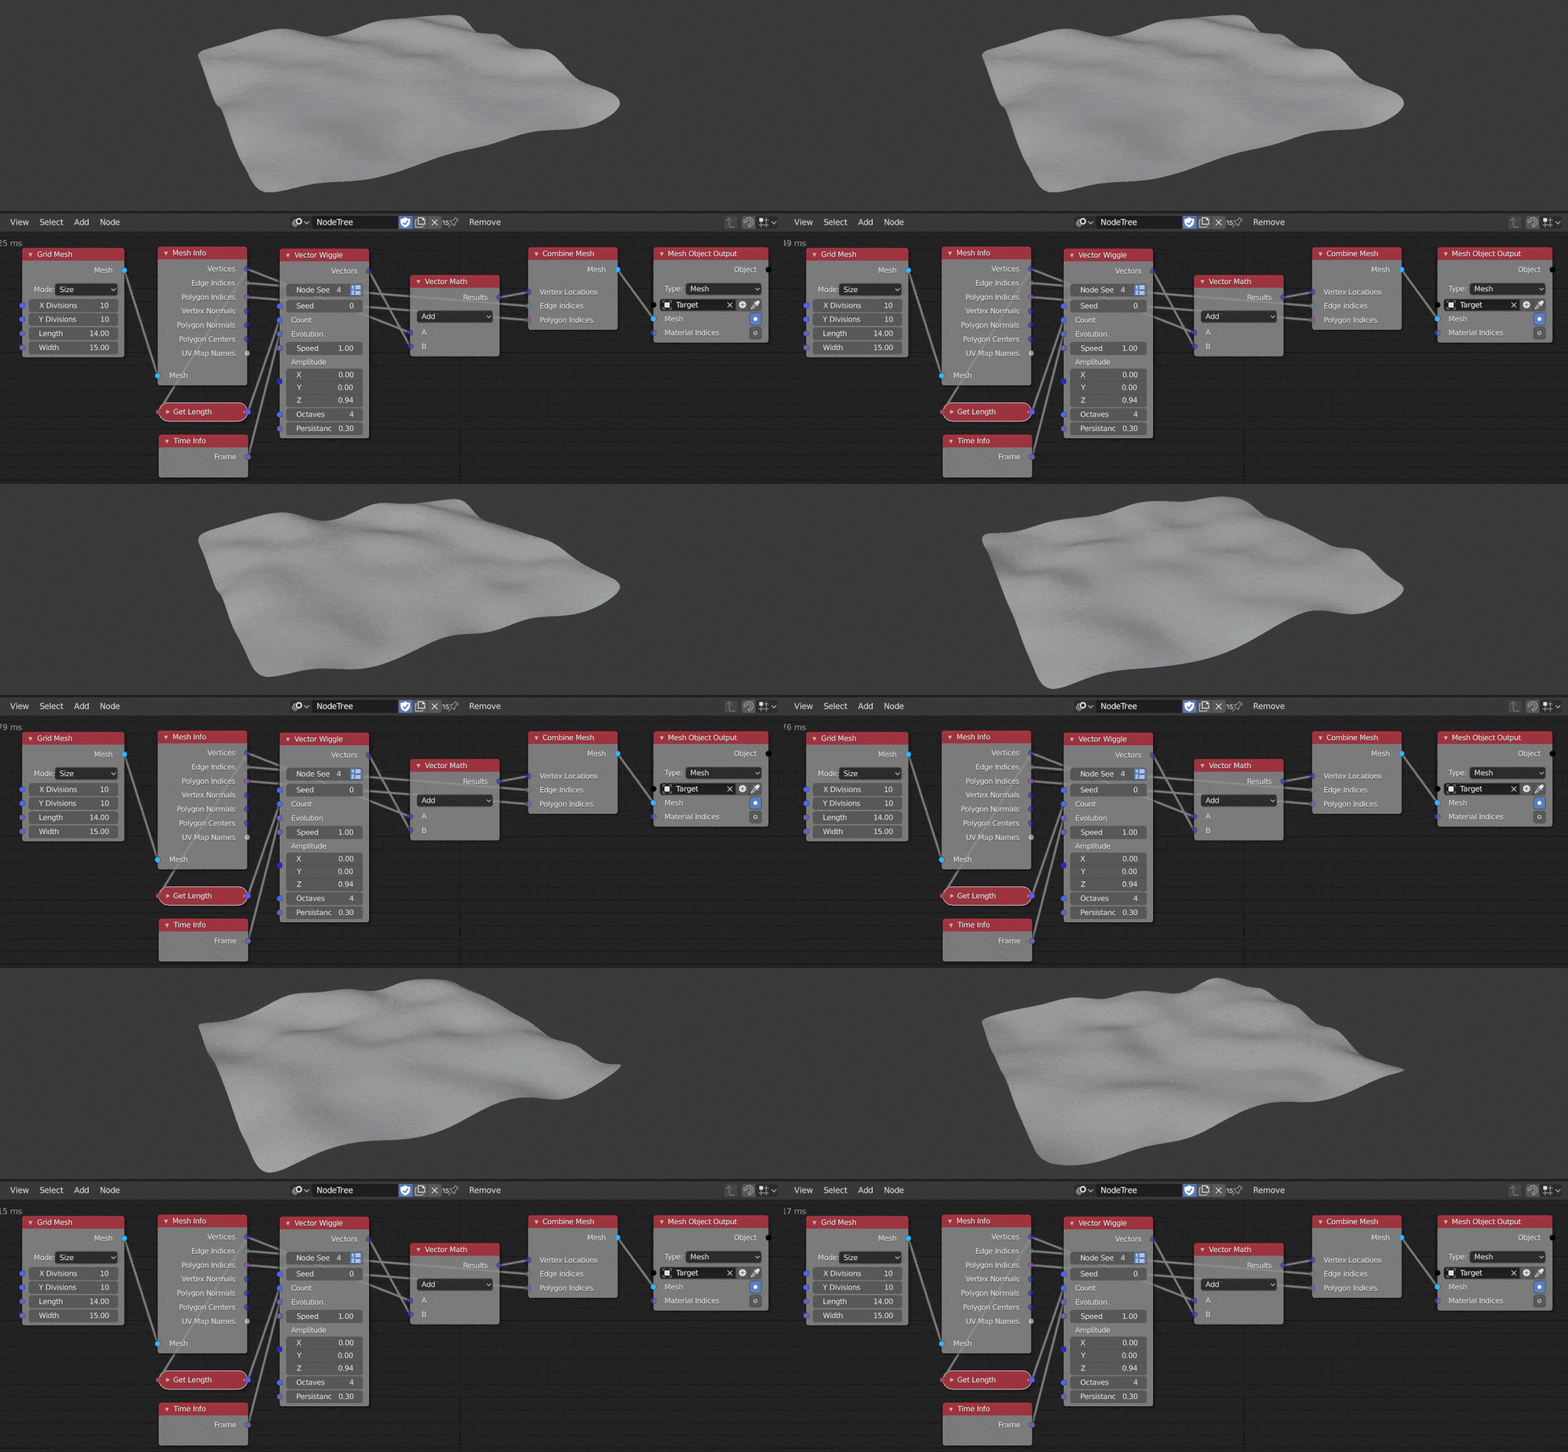
Here we start by generating a 10x10 grid object and add a random displacement for each vertex using a Vector Wiggle to randomize the vertex locations over time. I applied a Subdivision Surface Modifier to the grid object to get a smooth ripple with as few polys as possible.
Fake Ripples
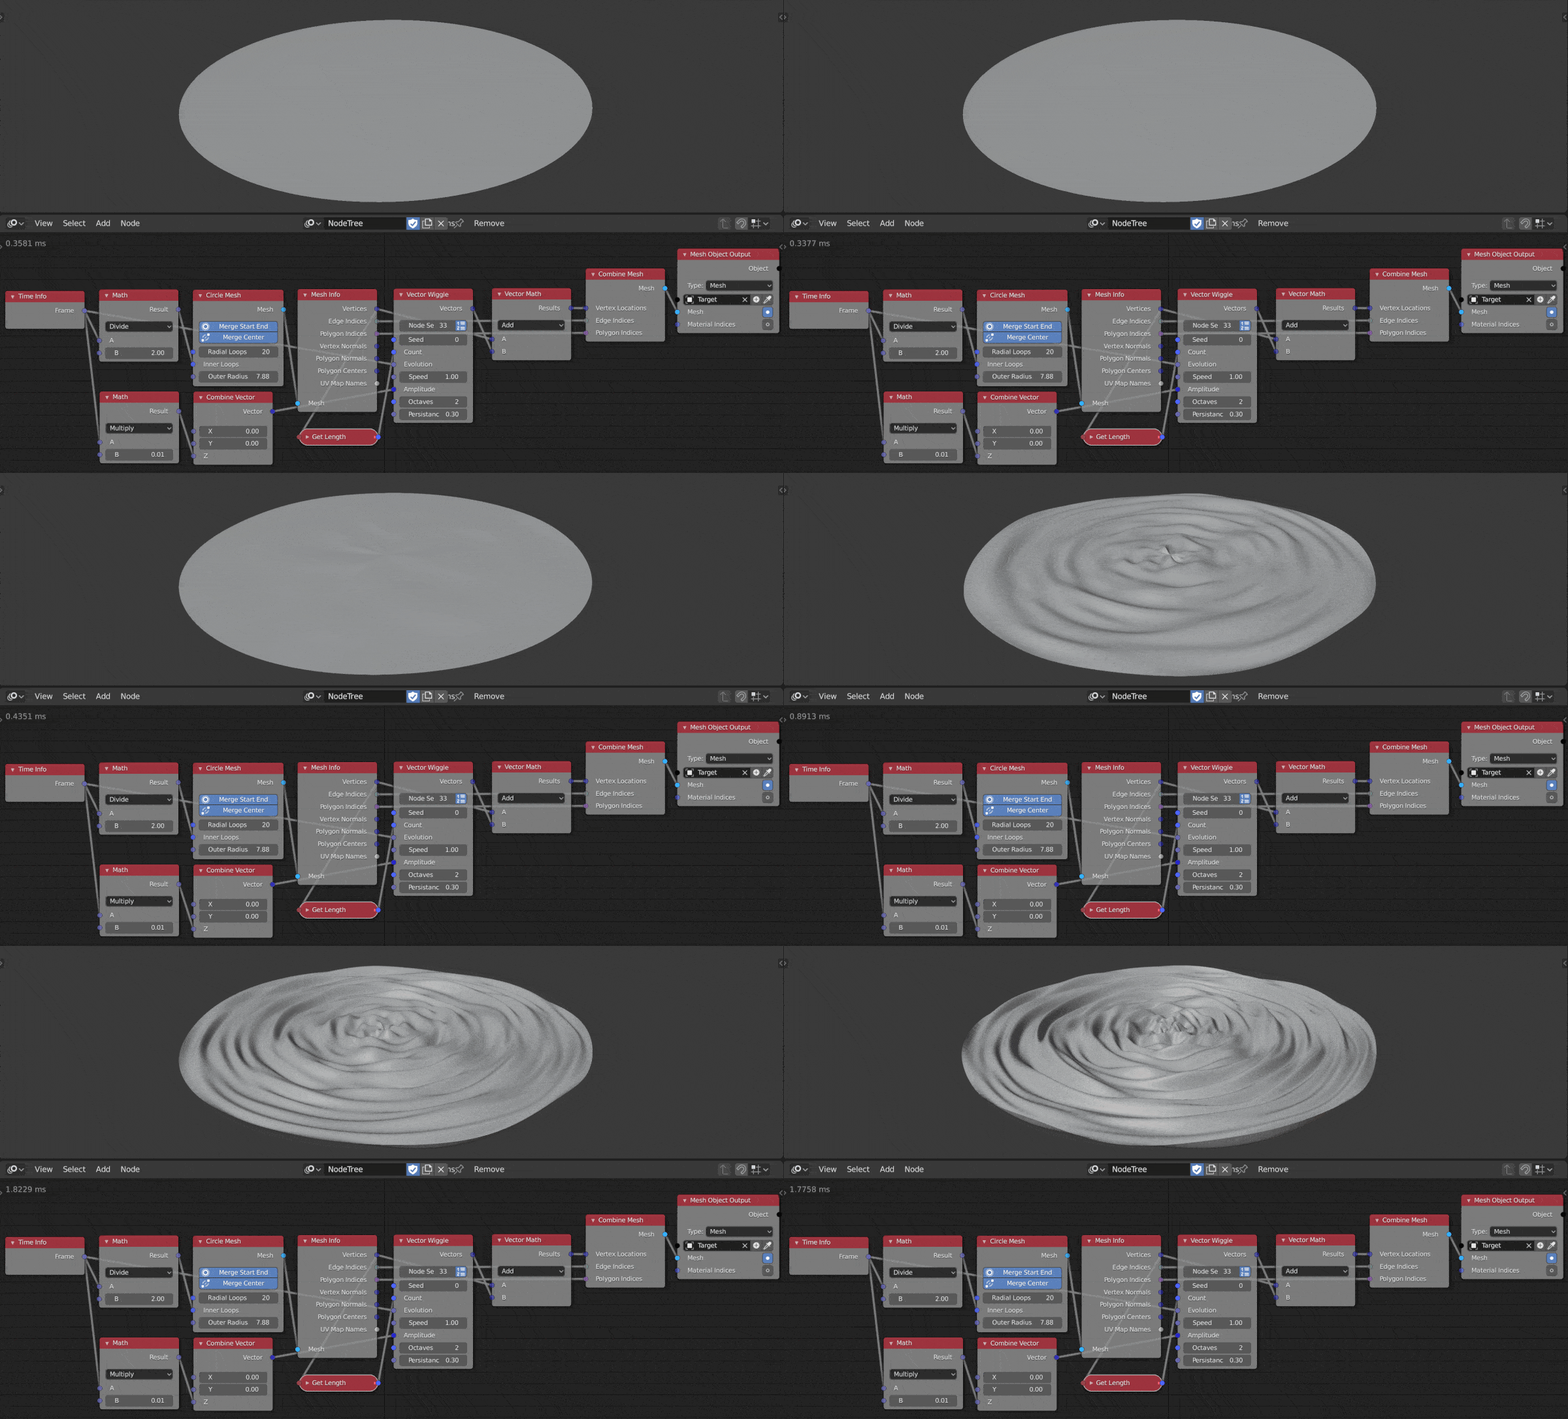
Below I use Vector Wiggle again but for a rippling effect instead of a wave effect. The actual poly count is low, I applied Subdiv or smooth shading on it to get it to look the way it does. The amount of loops in the circle increases with the Frame number. I also used the Frame and a Math node to gradually build the amplitude (height) of the ripples. Change the Math node values to adjust the look of the ripples.
Particle Wave
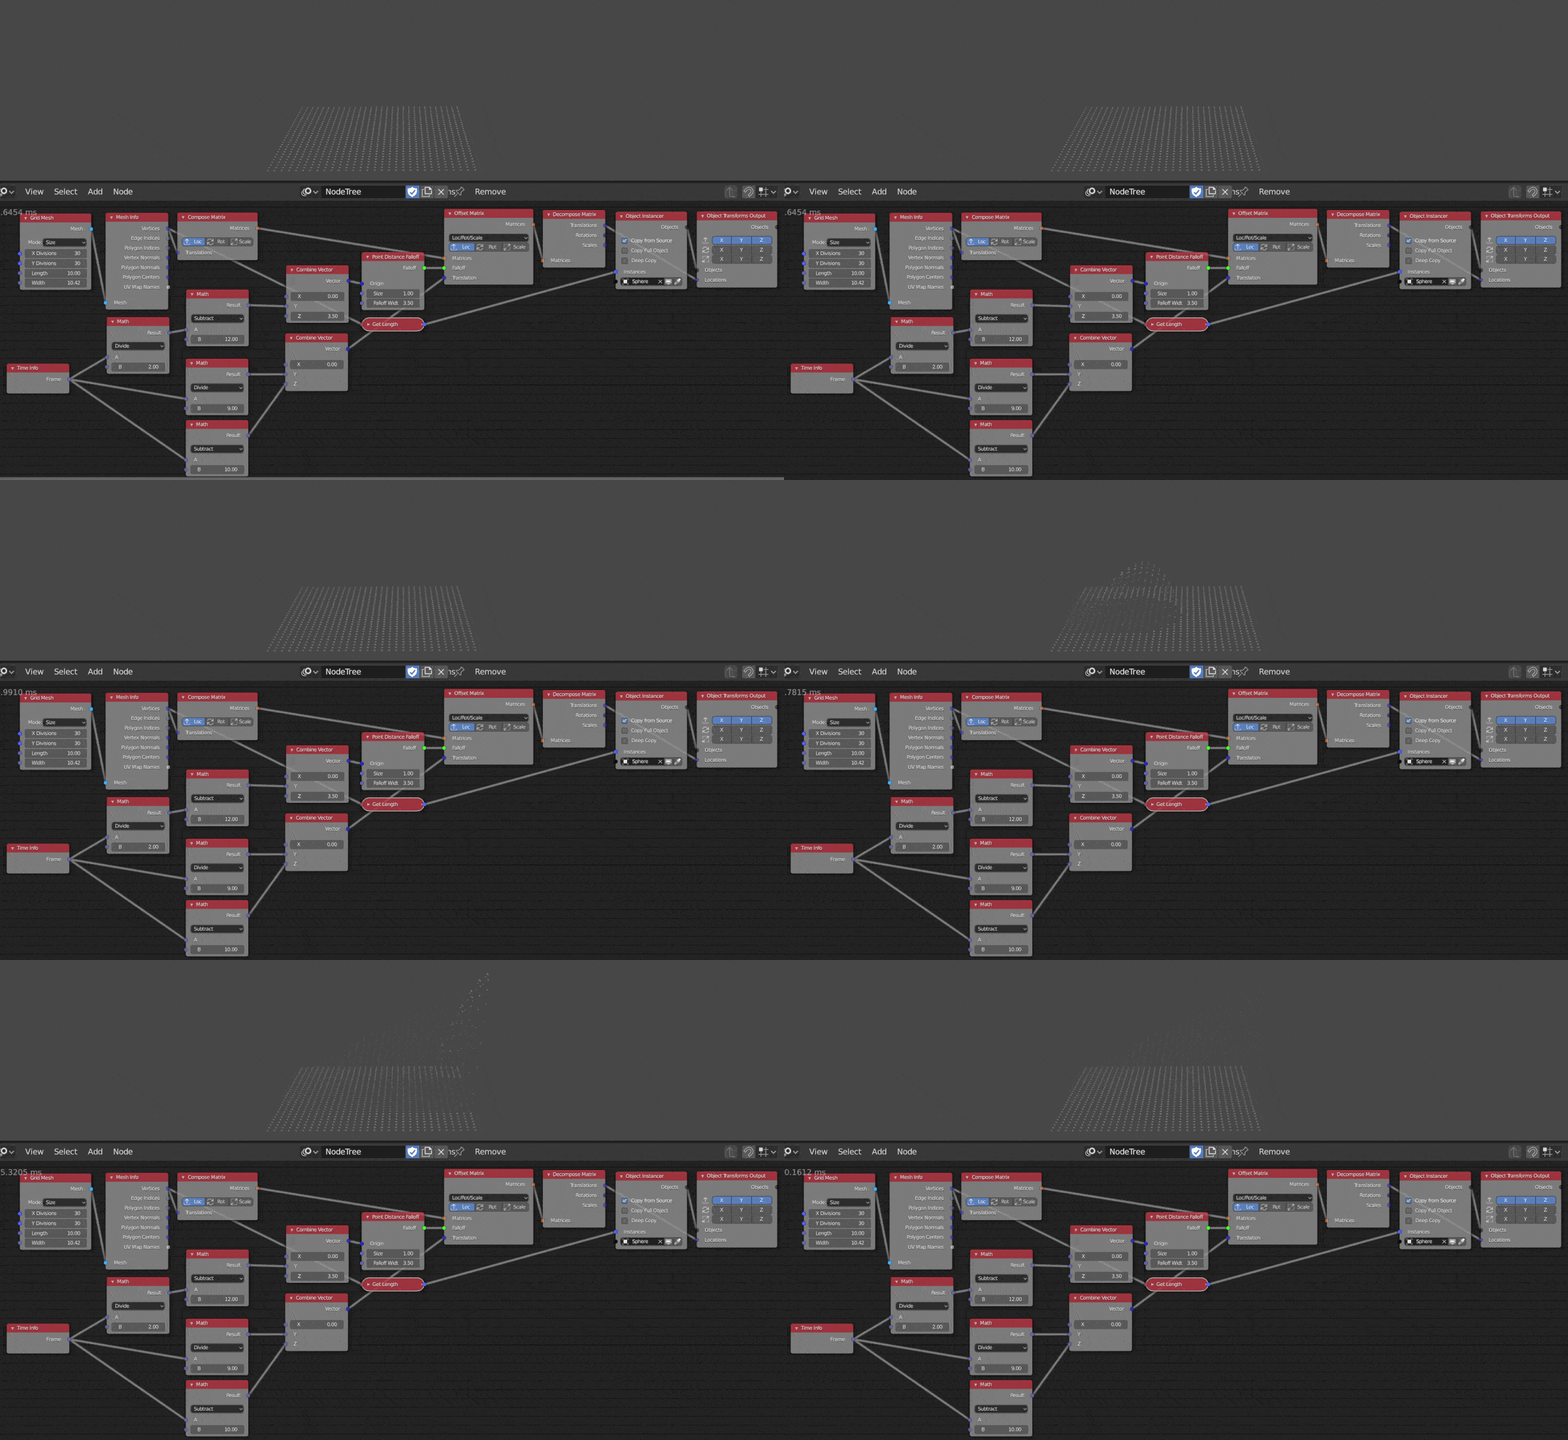
Here we have an increasing wave of particles displaced by an Offset Matrix and faded out with a Point Distance Falloff. I would suggest playing around with the Math nodes to understand how they're effecting the magnitude of the wave.
Randomness and Close points
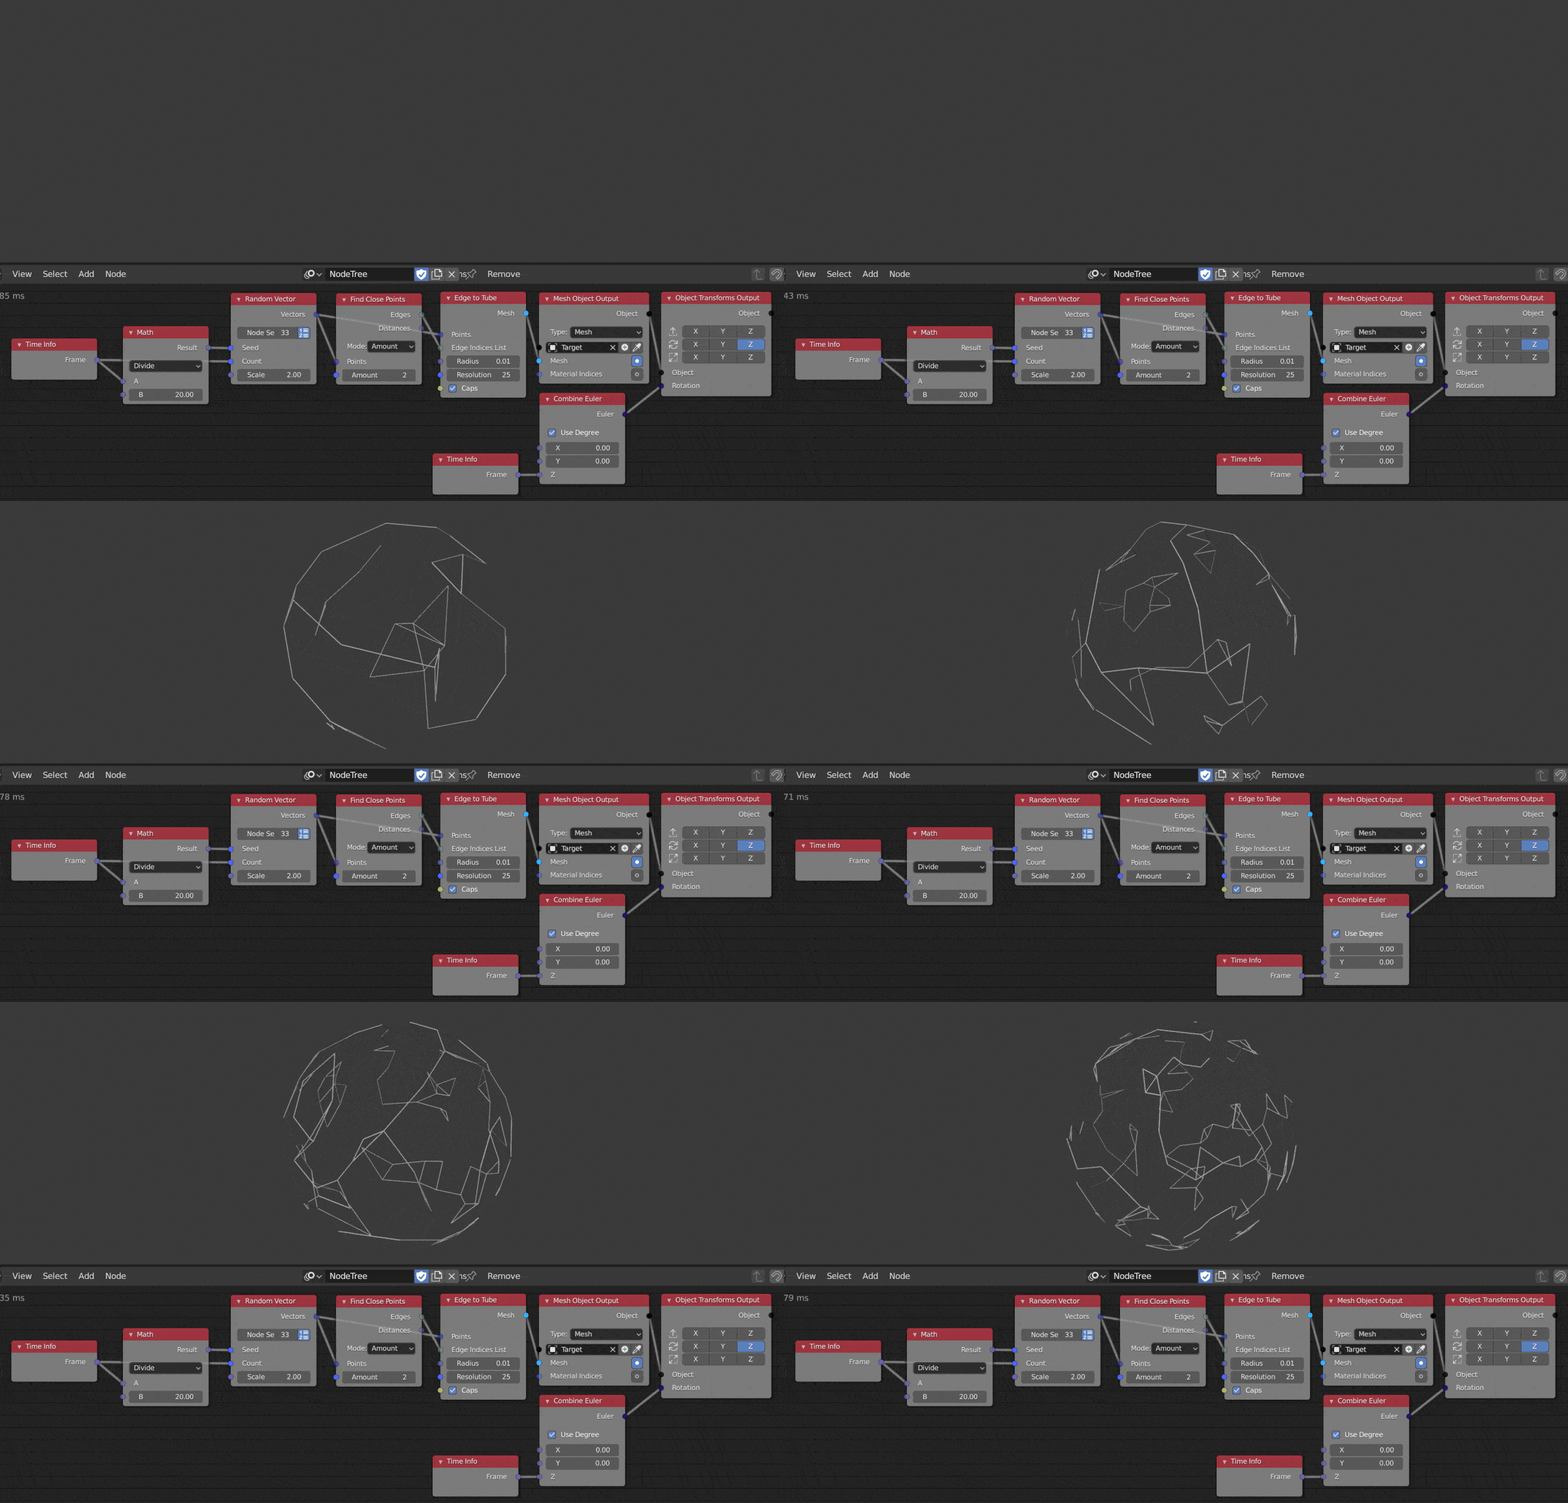
Fun use of a Random Vector and Find Close Points node reminiscent of a random walk. The network generates an increasing number of random vectors, finds the points that are close and connects them with Edge to Tube. Added a little rotation one the z axis with the Frame and Combine Euler nodes.
Vector Wiggle and Close points
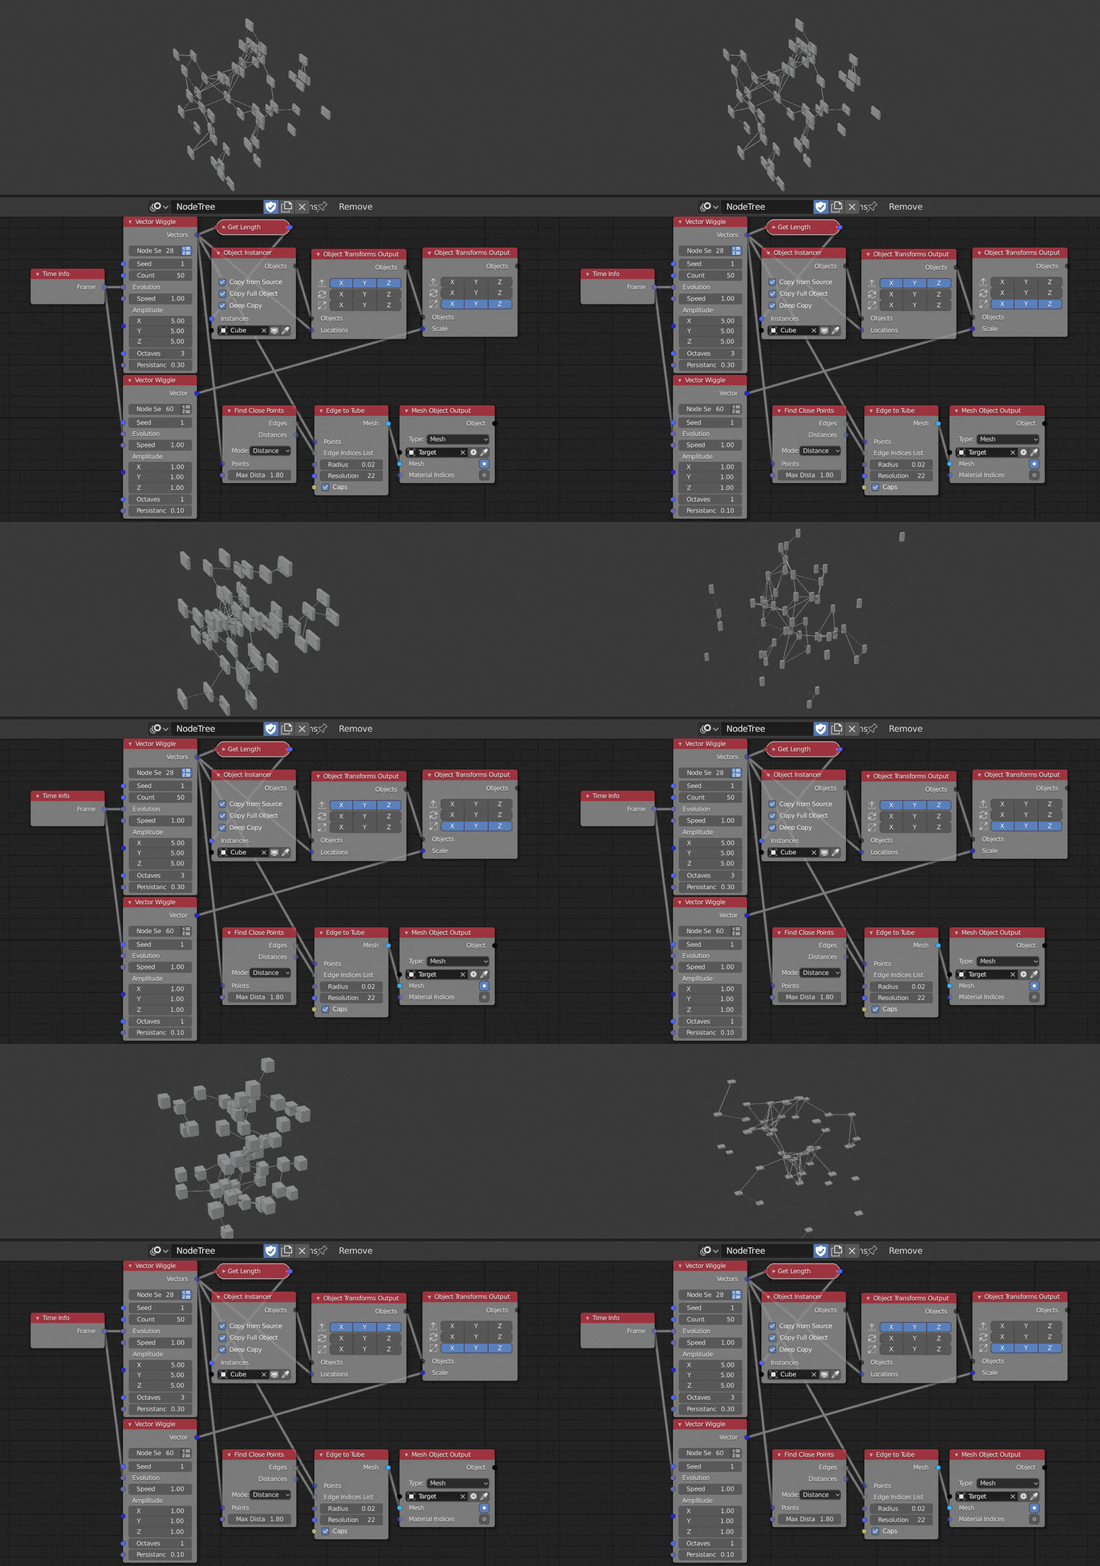
Here we use Vector Wiggle to randomly change the locations of instanced cubes. As they move, Find Close Points continuously calculates the objects 1.8 units from each other and connects them with Edge to Tube.
Rainbow Spheres
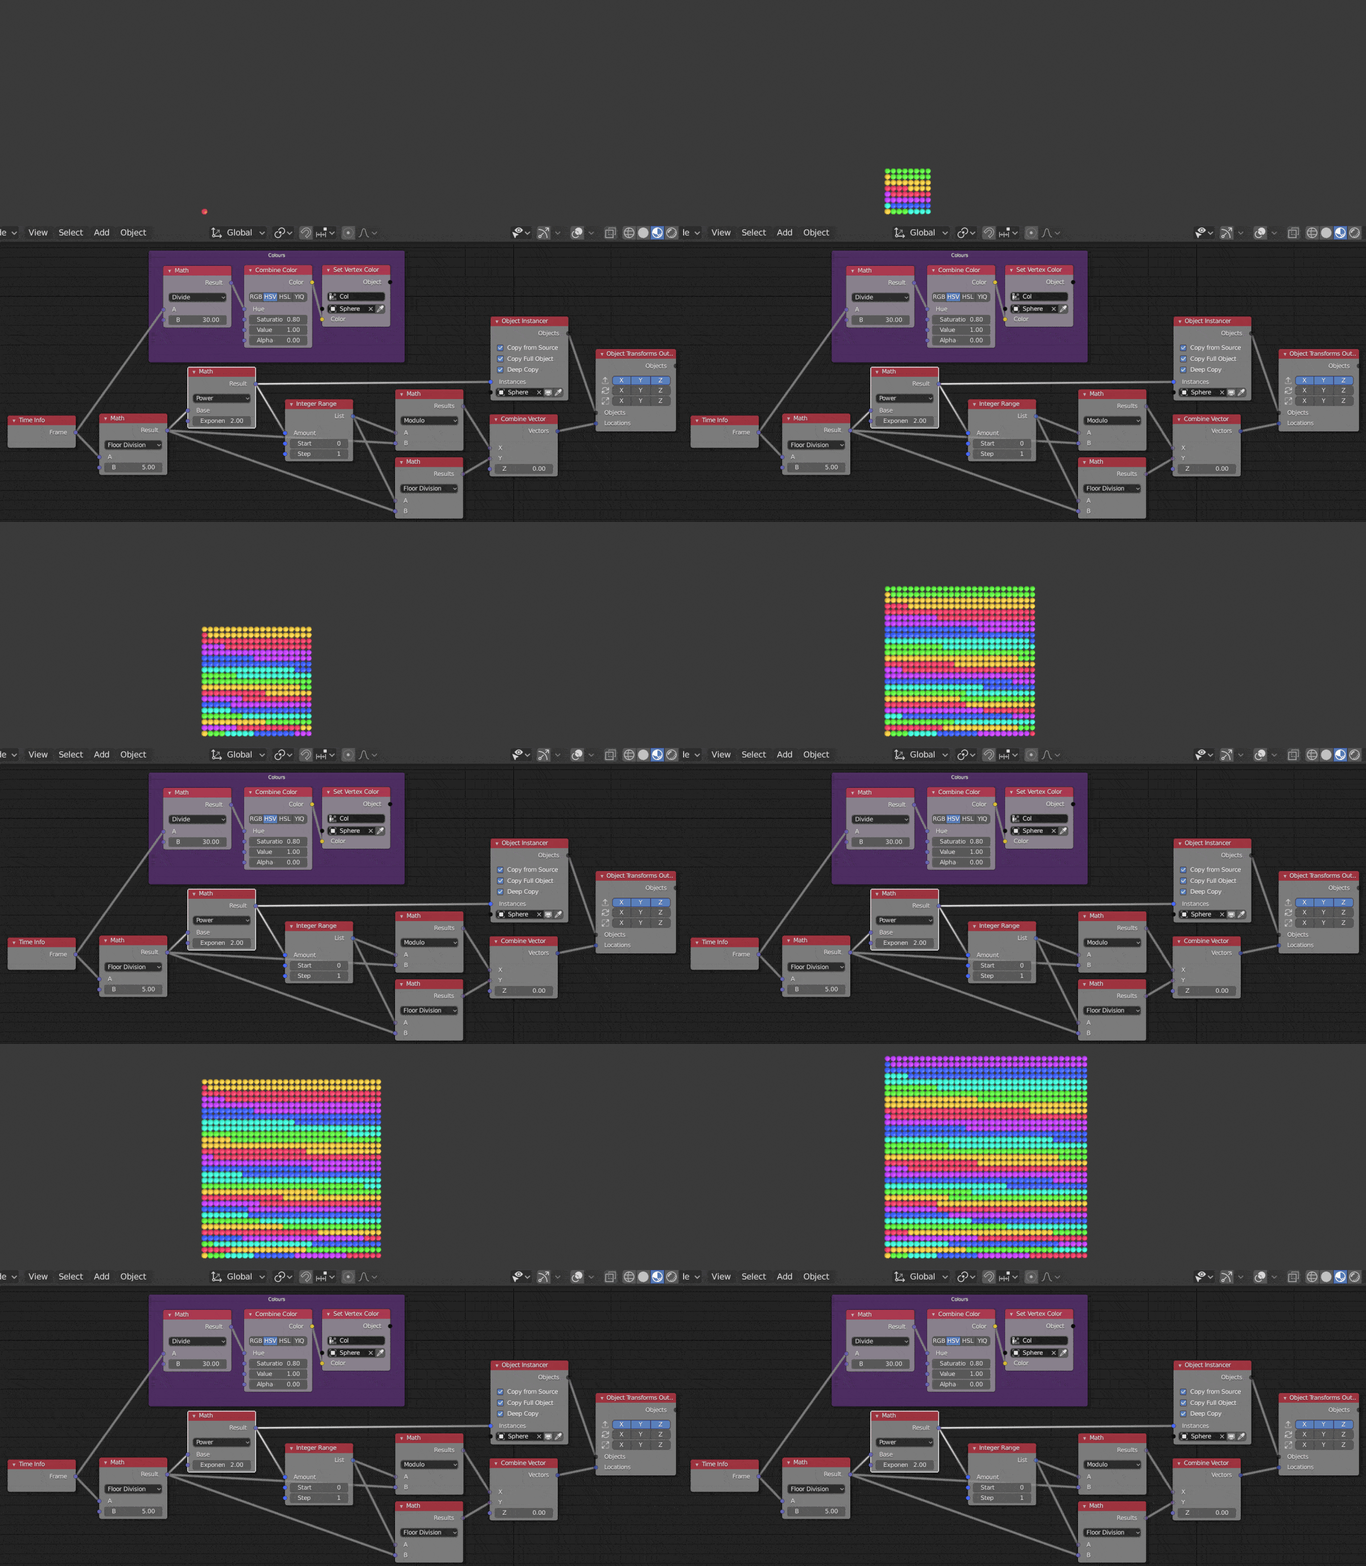
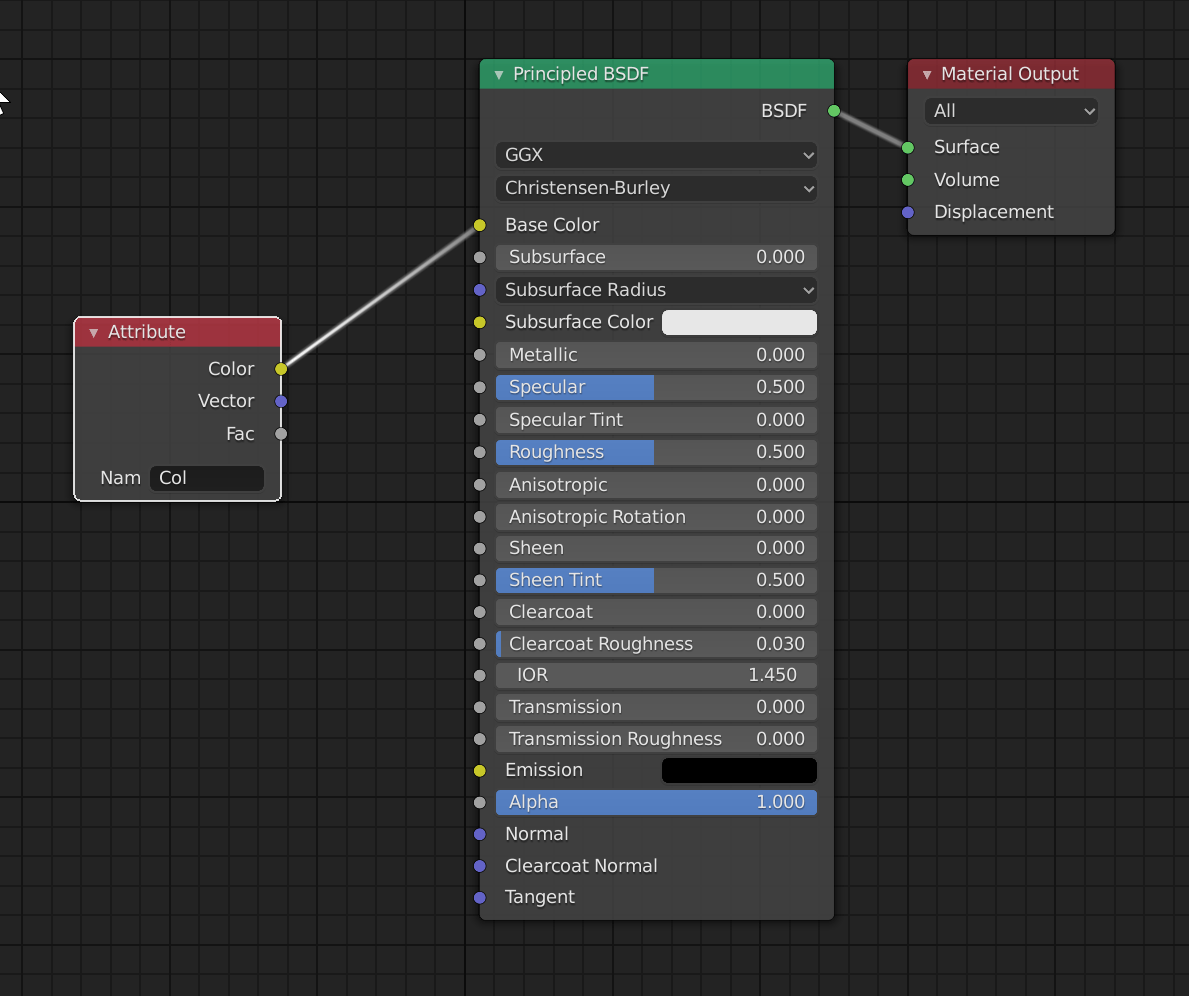
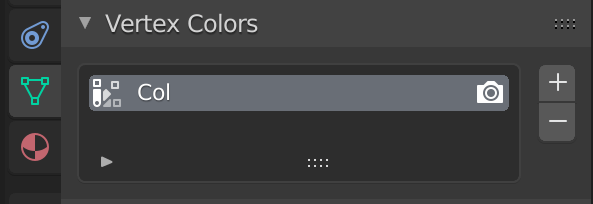
Here's a fun little effect with an Object Instancer and Vertex Colours. On every fifth frame, the spheres are multiplied by a Math (Power, raised to exponent 2) and colours are randomly generated across the span of the spheres. The b = 30 on the math node controlling the Hue is just to keep the number down between 0 and 1 for the range of frames that I had set. For the Vertex Colours I've put in an image for where to specify the Col attribute on your instancer object and it's shader network. Note: the jitter is just the gif.
Simple Clock
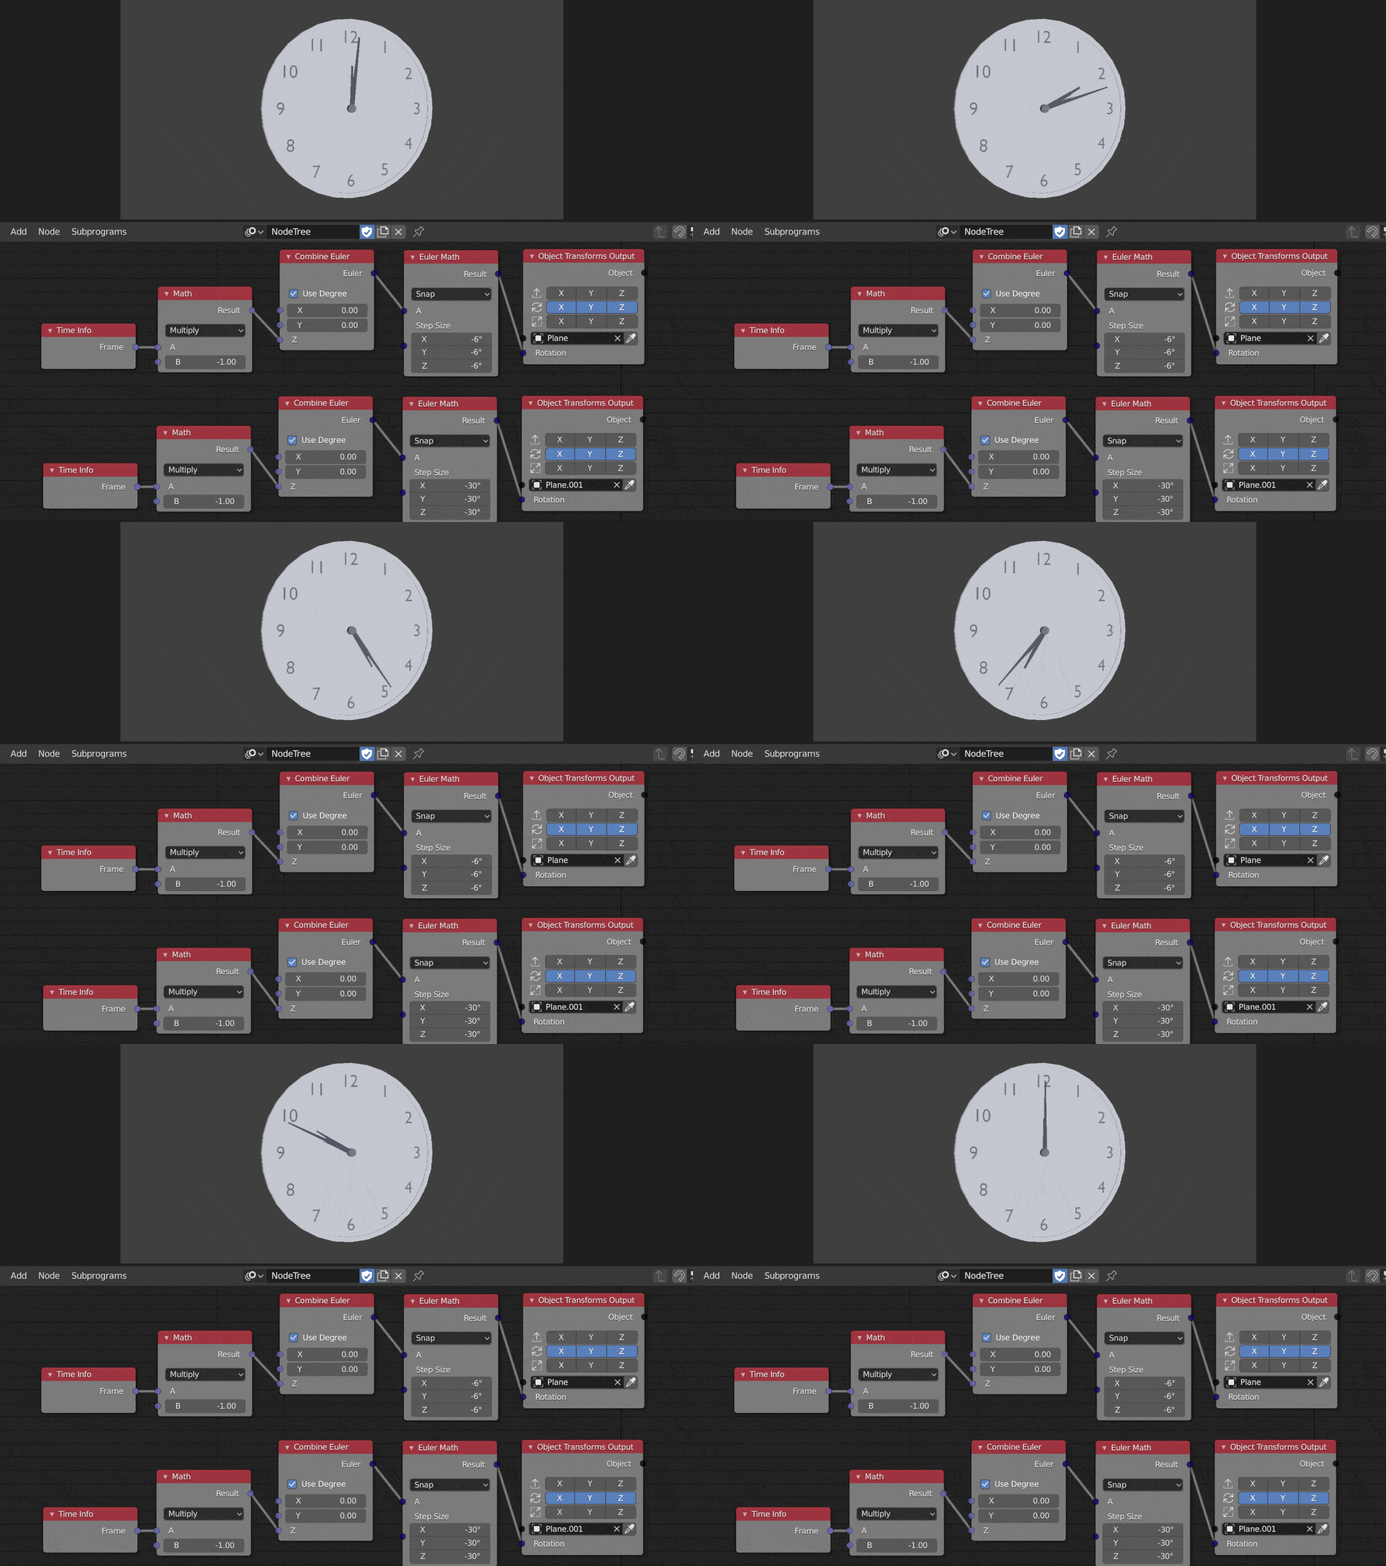
Euler nodes in Animation Nodes are used for defining rotations and any changes that you may want to make with them. Thankfully, Animations Nodes defines these rotations by degrees and not radians, which are less intuitive to understand. To illustrate the use of these nodes I've created a simple clock animation.
There are two networks, one for the rotation of the minute hand and one for the rotation of the hour hand. Obviously the hands don't move in the same timing that a normal one would, I doubt anyone wants to watch a gif that never ends, but the minute and hour positions are all correct. I set the Timeline to start at 1 and end at 360 because that made sense for the range of our angles. I set the angle for the hours to -30 degrees because 360/12 = 30, and then -6 degrees for the minutes because 360/60 = 6. The negative gives the clockwise direction, positive would move the handles in a counter-clockwise direction.
Random Poly Splines
In this example we will generate random growth with a poly spline.
First, we use a Vector Wiggle and Frame to generate random points and movement on those points. We then connect those points together with a spline using a Spline from Points node. The growth of the spline comes via the Trim Spline node where we set the Start to a constant value but End to a changing one to simulate 'growth'. We then output the spline with a little Bevel Depth via a Curve Object Output node.
