Recently we created some scripts for creating vertical column and horizontal bar graphs. I have developed some code for sorting and auto-keyframing two dimensional sets of data giving an effect similar to that of a Bar Graph Race. Personally, I find keyframing tedious so coding Python scripts to keyframe for me is the mood. The bar graphs we made in Part 1 and 1.2 have only a few bars so keyframing isn't so much of an issue but say, if you have many bars(depending on your data) or if you've ever keyframed a character before you'll know that these things start to get bothersome.
Here, I've created an example where our data changes over a few months and each month some rates of growth may be faster or slower for some of our bars. If you were to keyframe the growth of this data manually, this could take some time. Say you wanted to display data for the twelve months over a given year, for one bar you'd have to make 13 keyframes times that by the number of bars that you have and that work quickly adds up. I'm going to show you how to store and retrieve data of this kind from a Python dictionary and code it such that Blender does all the keyframing for you. :)
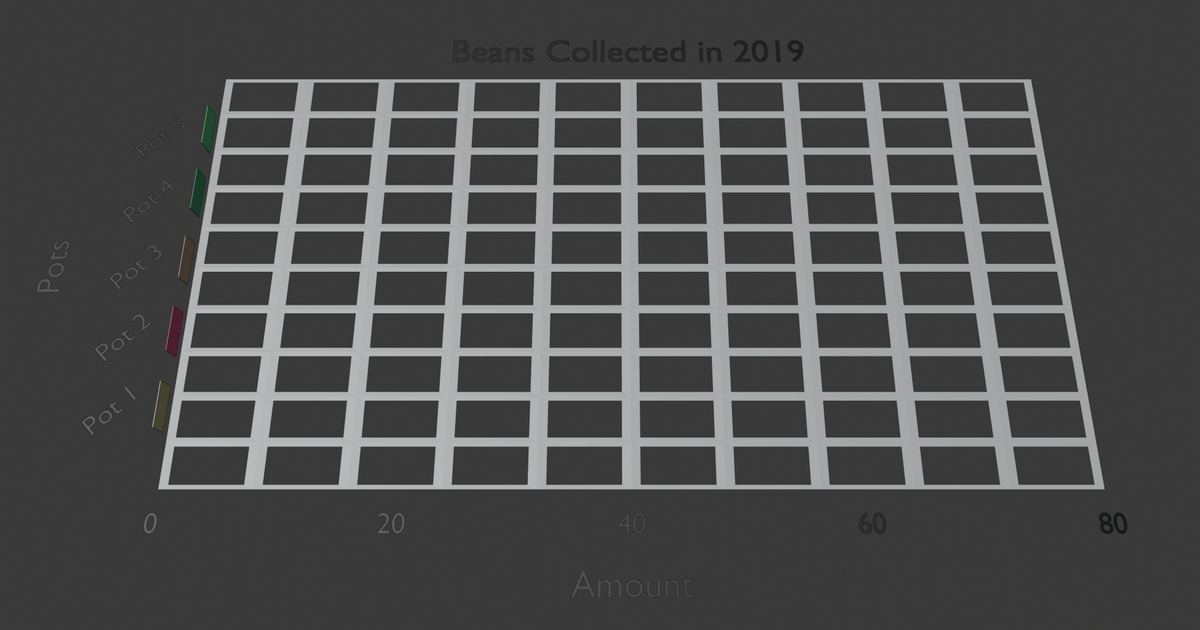
Before we can begin making our bar graph race animation, we need a graph to animate with. I have an example graph that I generated with some dummy data that can be found in the appendix at the end of this tutorial. The bars included here are just place holders. We don't want bars generated from our desired data yet because we have to do a little setting up in the viewport first. We're going to add our desired data in later with a different script.

So you should have a graph ready to go with all of your bars set to their minimum values as in the example image above. Do not set your values to 0 otherwise the cubes that get generated will not work when you attempt to apply hooks to them. Use a really small value. In my example, I used 0.01 for the length of all my cubes.
The first thing you want to do is get out of Scripting workspace and head into the Layout workspace and follow the below procedure:
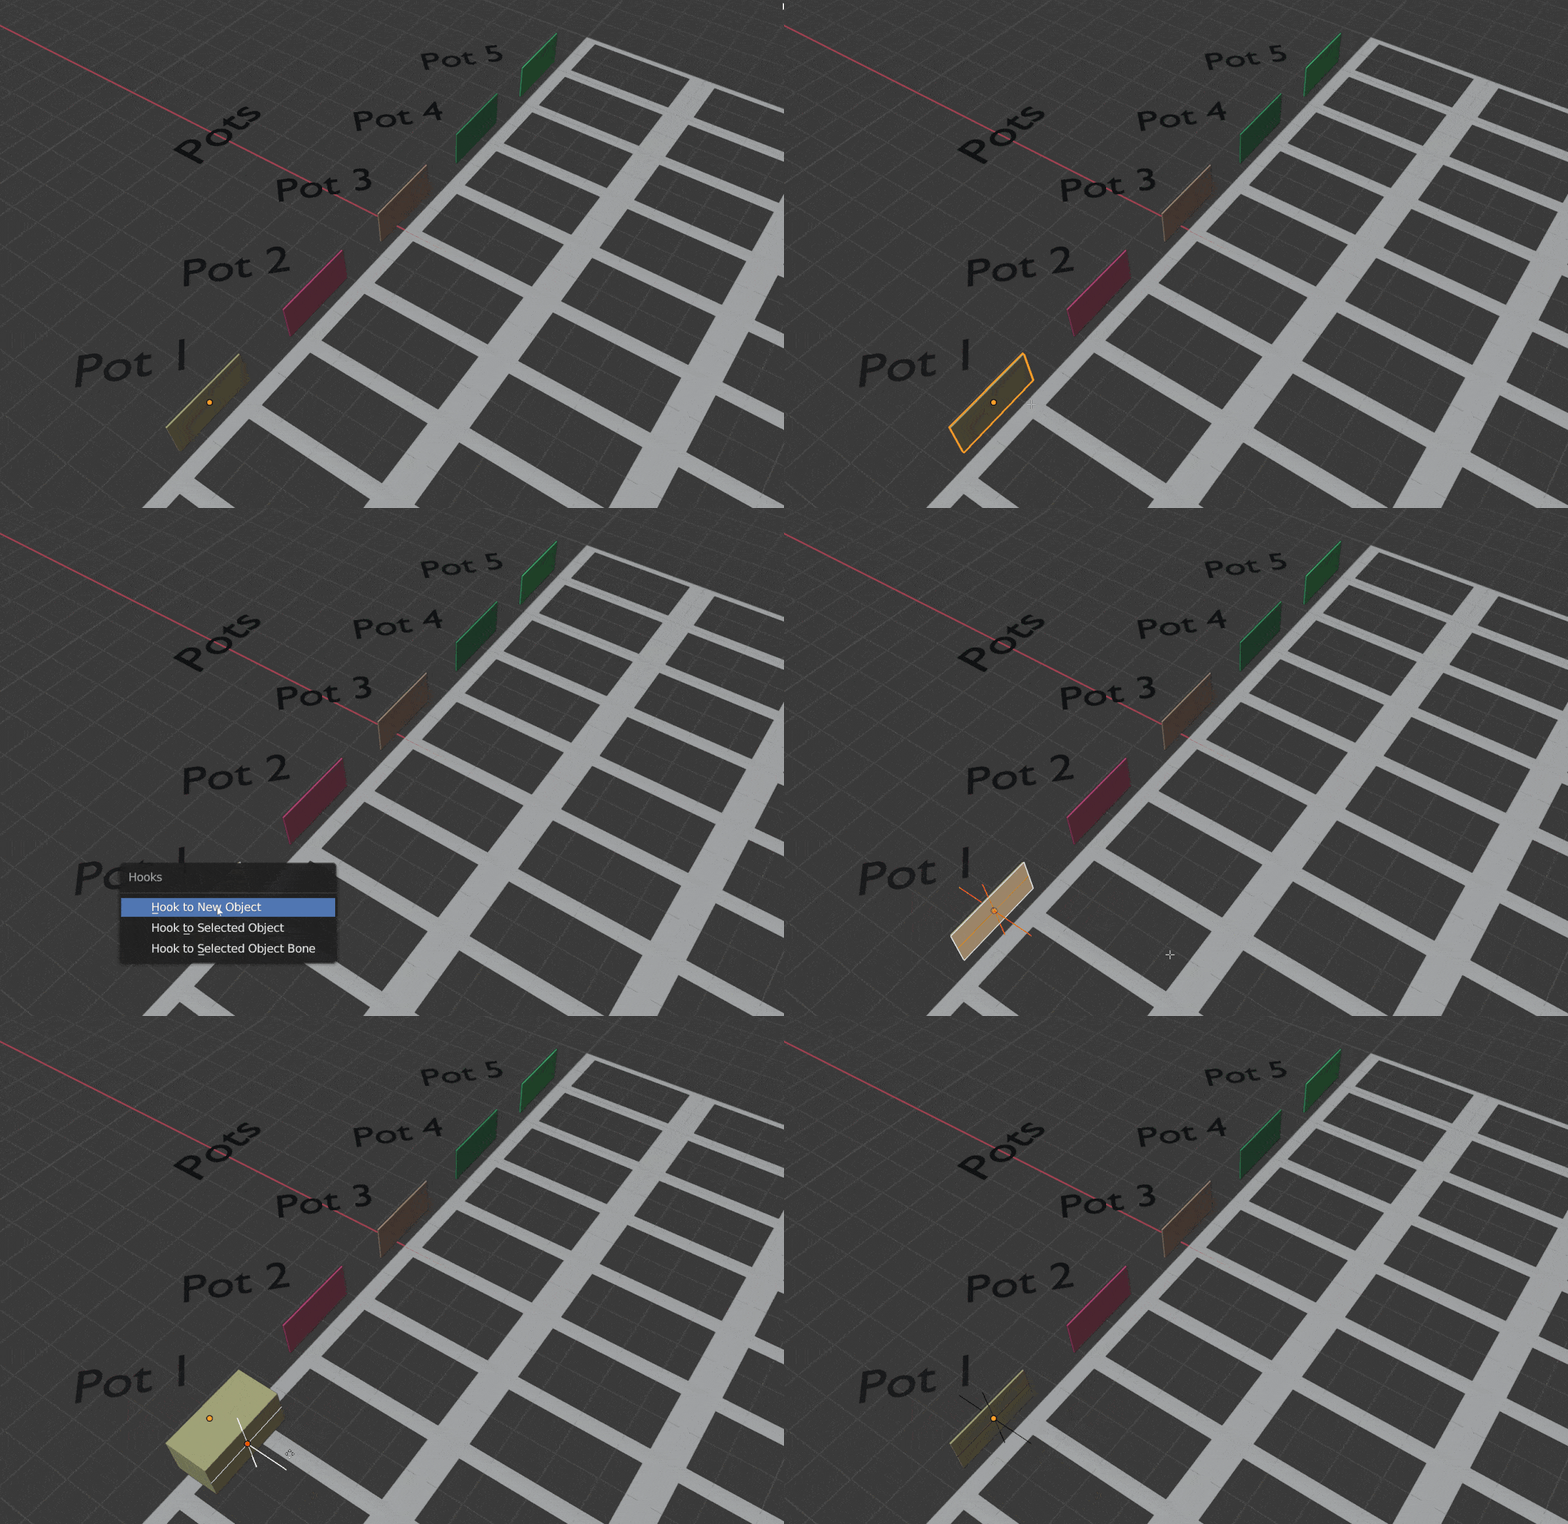
Select your first bar.Hit 'Tab' to enter Edit mode.Make sure that you're in face-select mode and select the right face of your cube.Press 'Ctrl'+'h' on your keyboard and select 'Hook to new object'.Hit 'Tab' again to get back into Object mode.Test the hook by deselecting your bar and moving the hook around. The bar should be stationary but the hook should stretch and shrink it's shape.Repeat steps 1 to 6 with your other bars.

In this example you need to rename your hooks to 'Hook0', 'Hook1', 'Hook2', and so on. Just follow that pattern and make sure that the name of your hooks match the name of your cubes. e.g. 'Cube' belongs with 'Hook0', 'Cube.001' belongs with 'Hook1' etc.
If you've never parented an object before what it essentially does is develop a hierarchy where the children of a parent object inherit some properties of that parent. Generally, child objects in Blender will inherit transforms/co-ordinates which is exactly what we want in this case.
We want to parent our hooks so that our cubes can move freely when we implement our sorting script. If we don't parent our hooks to our cubes then only the faces of our cubes attached to our hook will move and our graph becomes a mess. We also want to parent our bar labels to our bars so that they'll move with our bars when they get sorted. Make sure that you have nothing selected.
To parents our hooks and labels, follow the below steps:
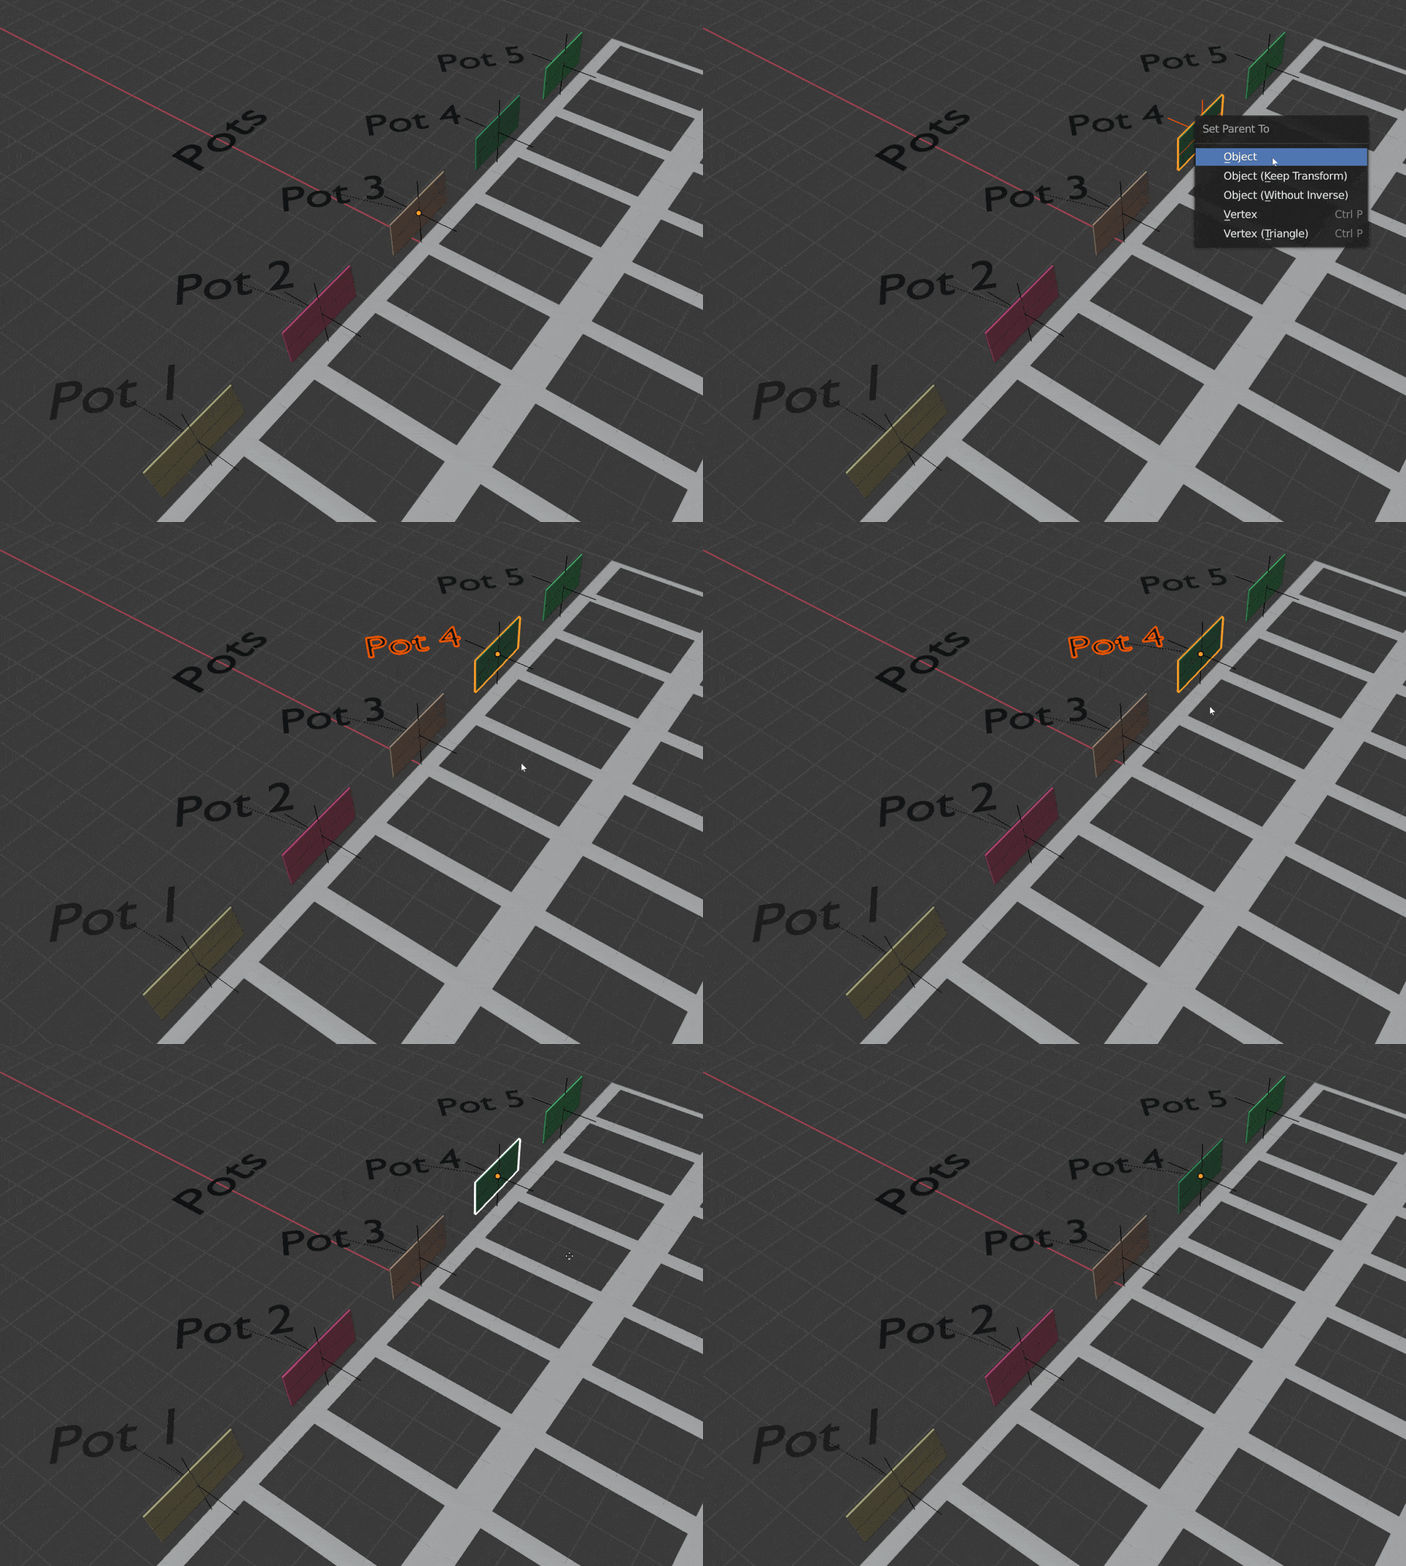
'Left-click'/select your first hook then 'shift'+'left-click' the corresponding bar. Both should be highlighted orange.Press 'Ctrl'+'p' on your keyboard and select 'Object'.Click away from both objects to deselect.'Left-click'/select your first label then 'shift'+'left-click' the corresponding bar.Press 'Ctrl'+'p' on your keyboard and select 'Object'.Click away from both objects to deselect.Repeat steps 1 to 7 for your other bars, hooks and bar labels.

Now that your bars, hooks and bar labels are parented you're ready to keyframe the starting positions of your bars. Make sure you set your current frame in the Timeline to 1. Then simply select your first bar, press 'i' on your keyboard and select 'Location' on the menu that appears. You'll need to do this for all of your bars and all of your hooks.

A final word from kit
Congrats! You've reach the end of the first half of Part 2. You should now know how to create Hooks in Blender to animate faces in your models, a technique which can be applied in any of your projects. The next part will show you how to script the keyframes we'll need to create for our race graph.
If you'd like to view an offline copy of this tutorial, here is a download link for the offline HTML version of the Jupyter notebook which includes both parts, with images included: Data Visualisation in Blender Part 2 Notebook
As always, if you have any questions or suggestions please direct them to the comment section below or send them by email: steambeanblog@gmail.com